Overview
The Thrust Calculator allows travel data to be uploaded along with groupings. Groupings, otherwise known in the travel industry custom fields and UDIDs, allow the travel emissions to be analysed at more granular levels, such as at a department or team level. Thrust Calculator users are able to add as many grouping types as they like to their instance within the Thrust Calculator. You will want to set up your grouping types before you start uploading data to the instance.
1. Grouping Types vs Groupings
A “grouping type” is the overarching name of the groupings used within a spreadsheet, whereas a “grouping” falls under “grouping type”. For example, for a grouping type called “Department Name”, the groupings that fall under this and would be present within a spreadsheet could be Sales, Marketing, Finance, Engineering etc.
Grouping types typically represent the business structure or travel setup of a company. Common examples of grouping types used are:
- Cost Center
- Department
- Point of Sale Country
- Employee Type
- Trip Purpose
2. Adding Grouping Types
Once you have created an instance within your organisation you can now add the grouping types. Click the settings button on the instance that you want to add grouping types to, as shown below. The settings can also be reached when you are in the instance, click on the button that states "settings" on the top right hand tab.

Next, click on the Data groupings tab:

Once in the Data groupings tab you are able to add the grouping types that you want included in the instance. Click on the button “+ New grouping type” and a pop out box will appear.

Within this pop-out specify the name of the new type of grouping. As shown below for this example the new type of grouping is called “Department Name. The description box is optional, and the type of data is set as “Other (default)”.
Press the save button once you are happy with the name of the grouping type.

The new grouping type will appear as a tab as shown below. You can add an infinite number of grouping types and they will all appear in this tab.

If you want to delete a grouping type that you have made, simply click on the grouping type you want to delete. The following page will display. Click on the "Delete" button.

Once you have added all the grouping types you want to be included in your instance you are ready to start uploading data. If you are doing a bulk upload the grouping types you have added will appear as you type in "grouping" into the input, as shown below.

When you have successfully completed an upload of data and added the groupings you can see which groupings have been added under each grouping type. In the below example you can see some of the groupings that have been captured from a bulk upload for the grouping type “point of sale country”; Canada, Chile, China etc.

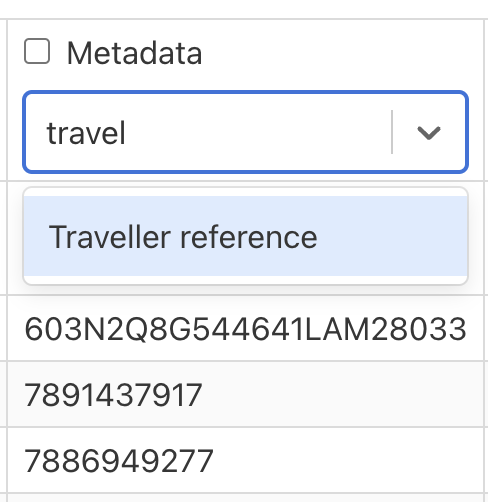
Note: It is not necessary to add "Employee ID" as a grouping type within your Thrust Calculator Instance as "Traveller Reference" is always included within every instance. To include the Traveller Reference in a bulk upload simply start typing "traveller reference" into the input box and the value will appear as shown below.
Was this article helpful?
That’s Great!
Thank you for your feedback
Sorry! We couldn't be helpful
Thank you for your feedback
Feedback sent
We appreciate your effort and will try to fix the article