Carbon Budgets are a useful tool to support your organisation with bringing visibility to carbon emissions from your business travel. Similar to a financial budget, carbon budgets provide a limit to the amount of carbon that a department can “spend” on business travel each year.
Your organisation needs to have a clear vision / established goal for reducing the CO2 emissions from business travel. Once this goal is known, the “available” CO2 emissions for the year can be divided up and cascaded down through the business departments to ensure that each area of the business can be held accountable for their contribution to the reduction of carbon emissions.
For example; if the total carbon allocation for 2022 is 56,000 tonnes CO2e and the Operations department has 20% of that allocation then their budget is 20% of 56,000 tonnes CO2e which is 11,200 tonnes CO2e.
1. Set a target and baseline
See User Guide: Set a baseline.
2. Set the carbon budgets
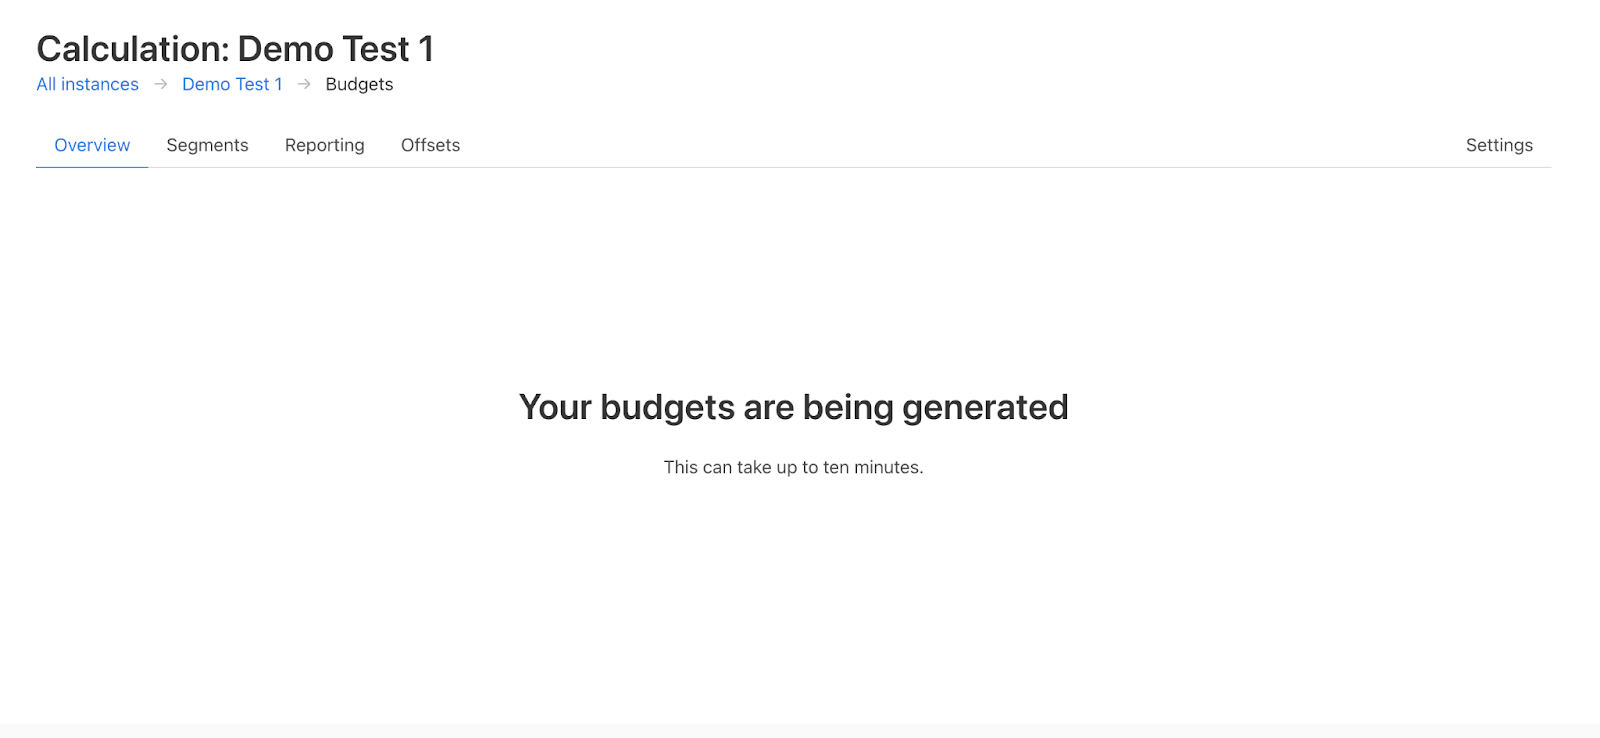
In the overview page of your instance navigate to the “Budget” widget and click on “Set a carbon budget”.

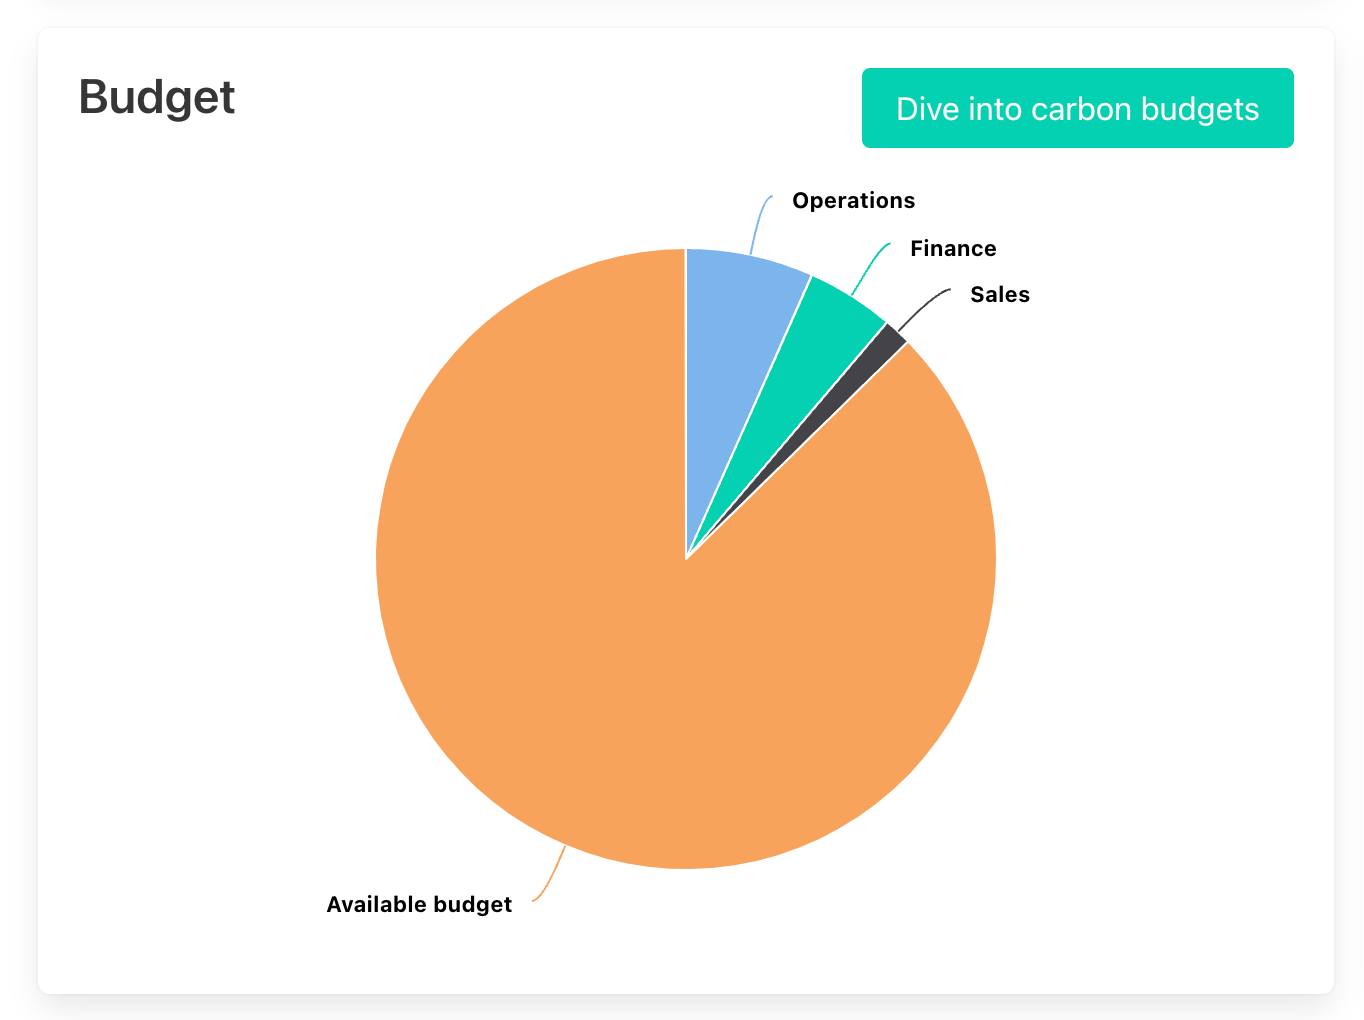
The below “Carbon Budgets” page will open. You now need to configure the top level fields.

For this example we are wanting to create a budget for the year 2023 using 2019 as the data trend year and “Department Name” as the grouping type we will be splitting the budget across.
Budget Year | Enter the year you are creating the budgets for. |
Data trend year | Enter the year whose actuals you want to use to allocate budgets e.g. if you pick 2022 and Operations' emissions were 20% of the total in 2022, then their allocation will be 20% of that year's total available emission amount across the travel programme. |
Department type | Select the Grouping Type field that should be used for the budget setting. This would be the Grouping Type that contains the departments you want to allocate budgets to. |
Target % | Enter the percentage of your business' total carbon allocation that should be used to create the budgets. Thrust Carbon recommends using 90% to allow a 10% "buffer" for new departments or unforeseen emissions. |
Refresh the screen to display the below: the auto-calculated budgets.
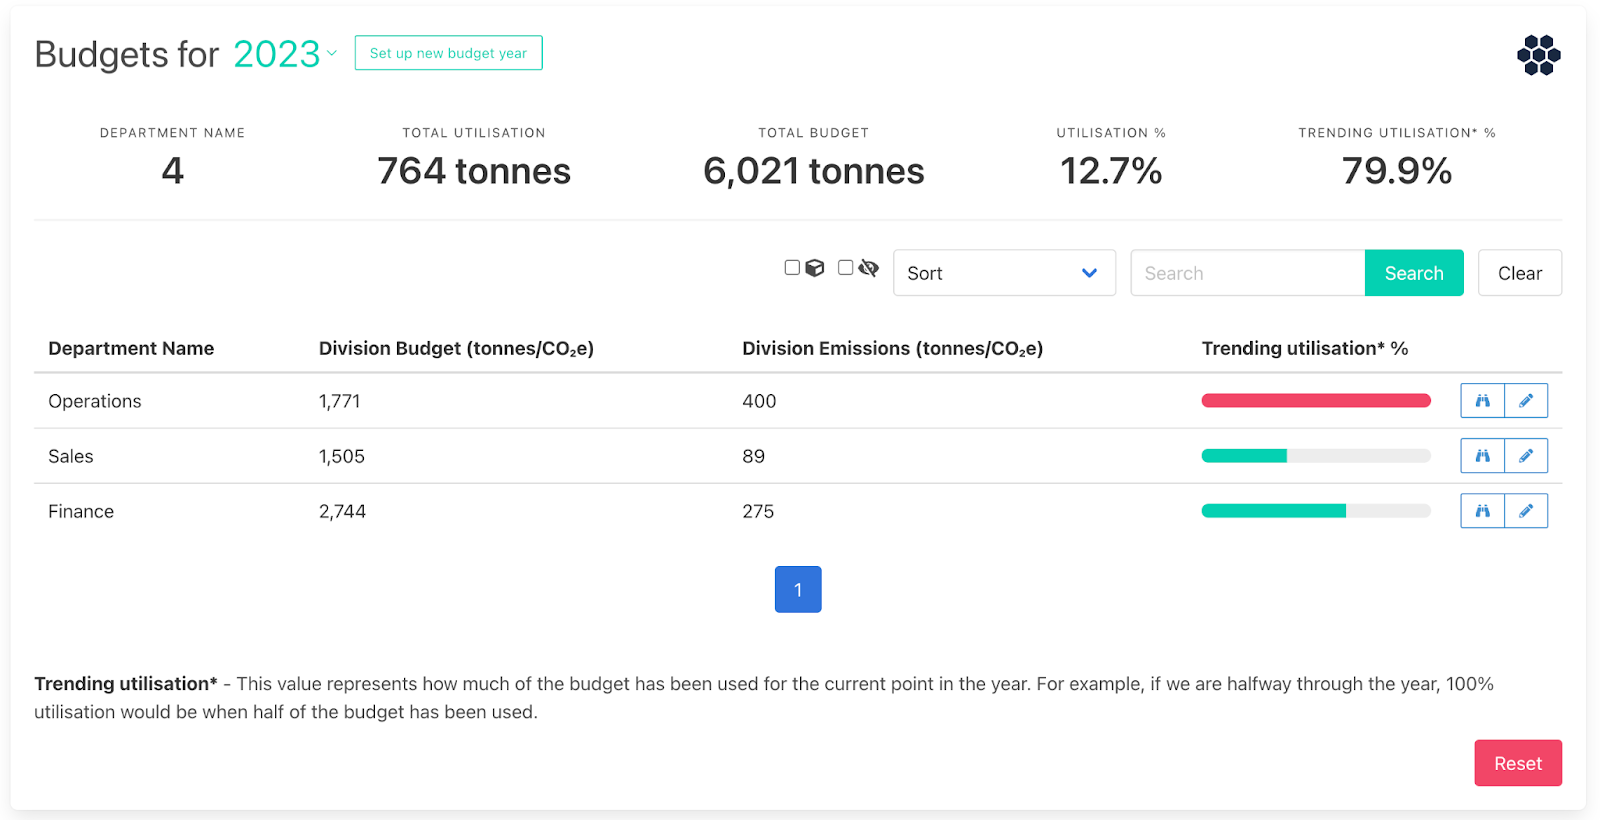
In the example provided above, the headings should be interpreted as follows:
Department Name | This is the Grouping name selected as the basis for allocating % splits. |
Total Utilisation | This is the current amount of carbon emissions in the budget year. |
Total Budget | This is the carbon emissions budget for the year. (Note this is the target % of your total budget for that year - in this example we used 90% as the target %) |
Utilisation % | This is the current % of the full budget used. |
Trending Utilisation % | This value represents how much of the budget has been used for the current point in the year. For example, if we are halfway through the year, 100% trending utilisation would be when half of the budget has been used. |
3. Modifying the budgets
If the auto-generated budgets are not quite what you are after, you can edit the budgets for each department. Simply click on the “edit budget” button next to the department you want to change the budget for.
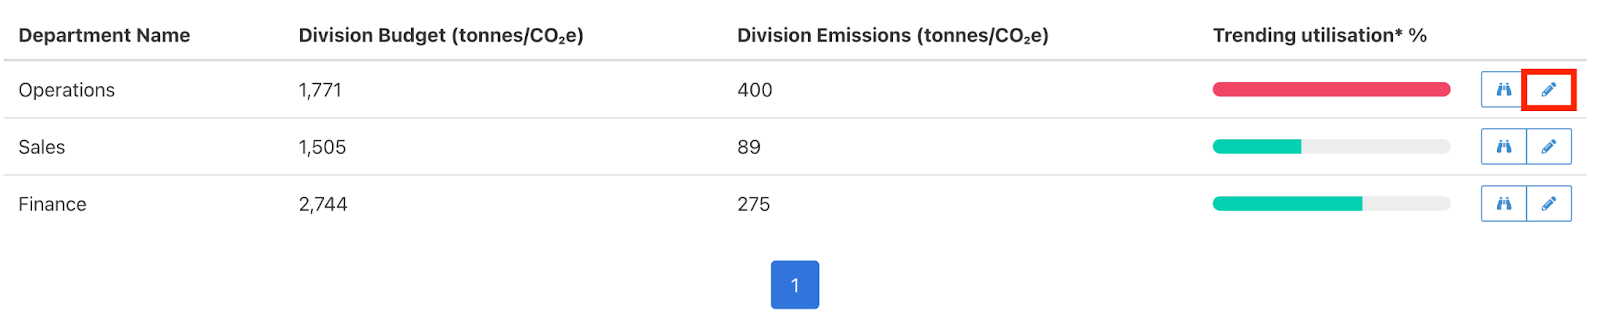
In this example we are editing the budget for Operations. As shown below you can choose whether to manually update the emissions amount or adjust the percentage. Whichever option is edited, you must click the button for “Use this value to update” for the Calculator to apply the new value.
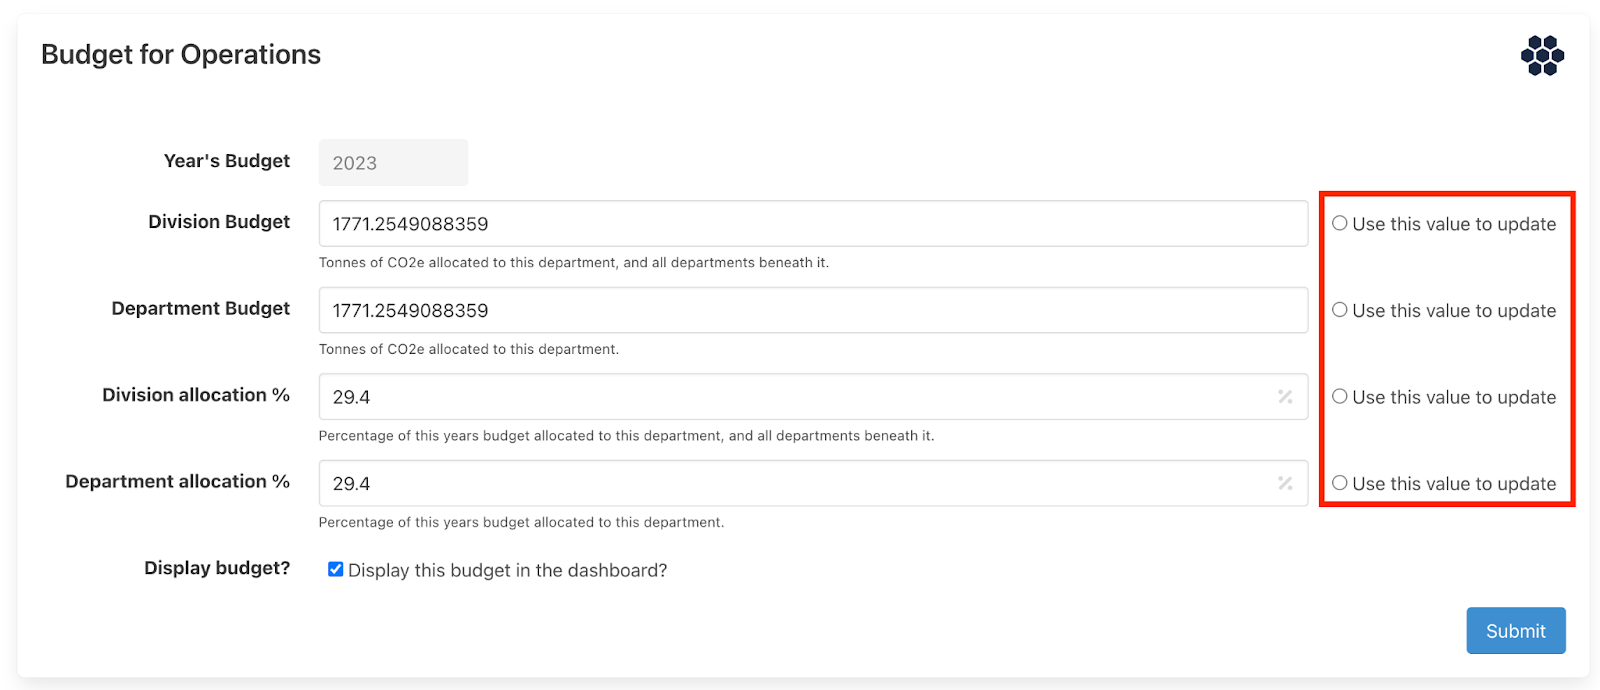
This feature allows you to move allocations in response to travel patterns as necessary. Be sure to not simply add budget allocation without removing it from another department.
4. Viewing Budgets
Once you have set up your budgets, the “Budget” widget in the overview page will visually display the breakdown of the carbon emission utilisation for the year.
Was this article helpful?
That’s Great!
Thank you for your feedback
Sorry! We couldn't be helpful
Thank you for your feedback
Feedback sent
We appreciate your effort and will try to fix the article