Overview
Sometimes the Travel Team, or other areas of a business, prefer raw data export where they can filter and use data as they need for internal processes. For this scenario the "Export your segments" report should be used.
1. Generate your Emissions Data CSV
Access your instance that you would like to create a report for by clicking on the blue arrow on the right of the row.
![]()
Once you are in the instance, to create a report click on the “reporting” header as shown below.

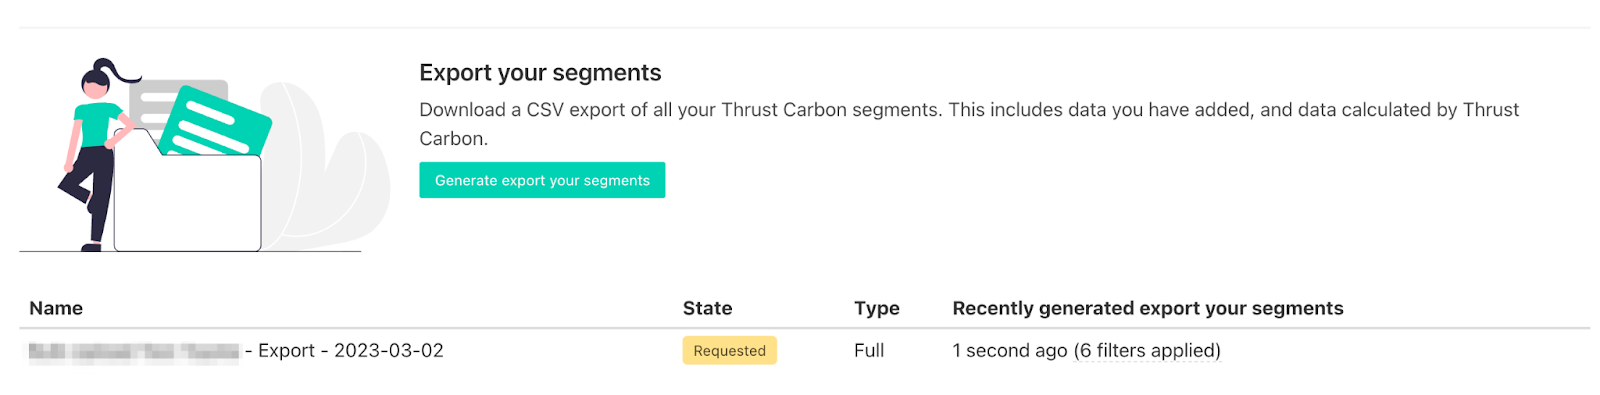
Scroll down on the reporting page to the “Export your segment” section and click on the “Generate export your segments” button outlined below.

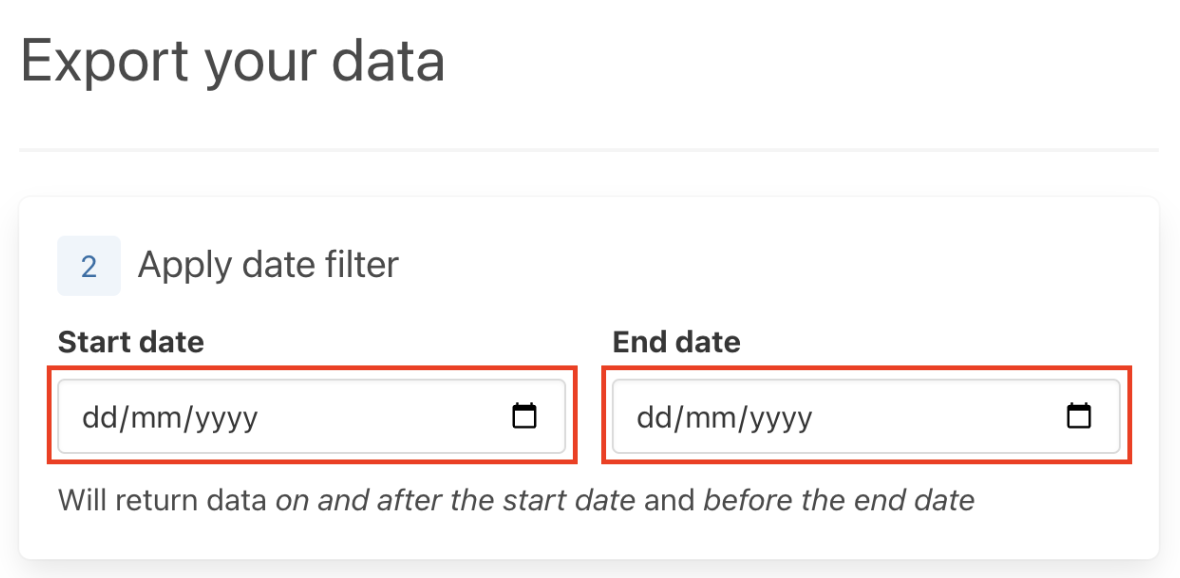
A pop-up form will appear. First, add the start and end date for the period you would like to be included in the exported data by either typing in the boxes highlighted below or using the drop down list calendar.
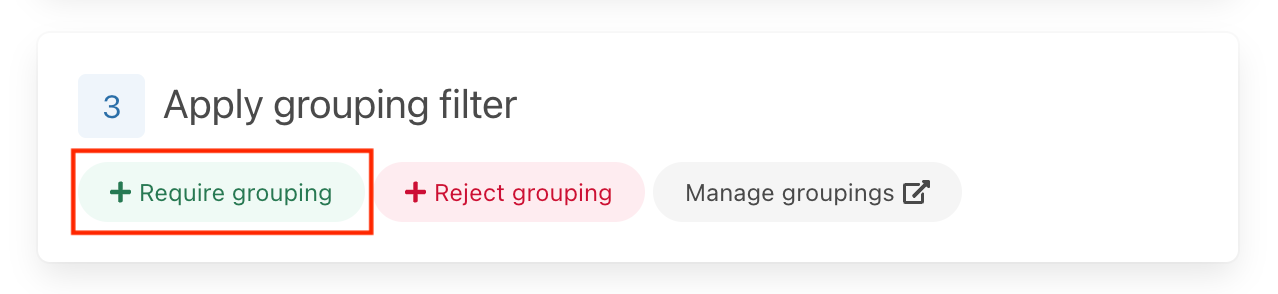
Next you can apply a grouping filter. To add a grouping you want included in your CSV report on the green “+ Require grouping” button and select the grouping type from the drop down box on the left and use the search box for the name of the grouping you want to be included in the report. Repeat this process for each required grouping.
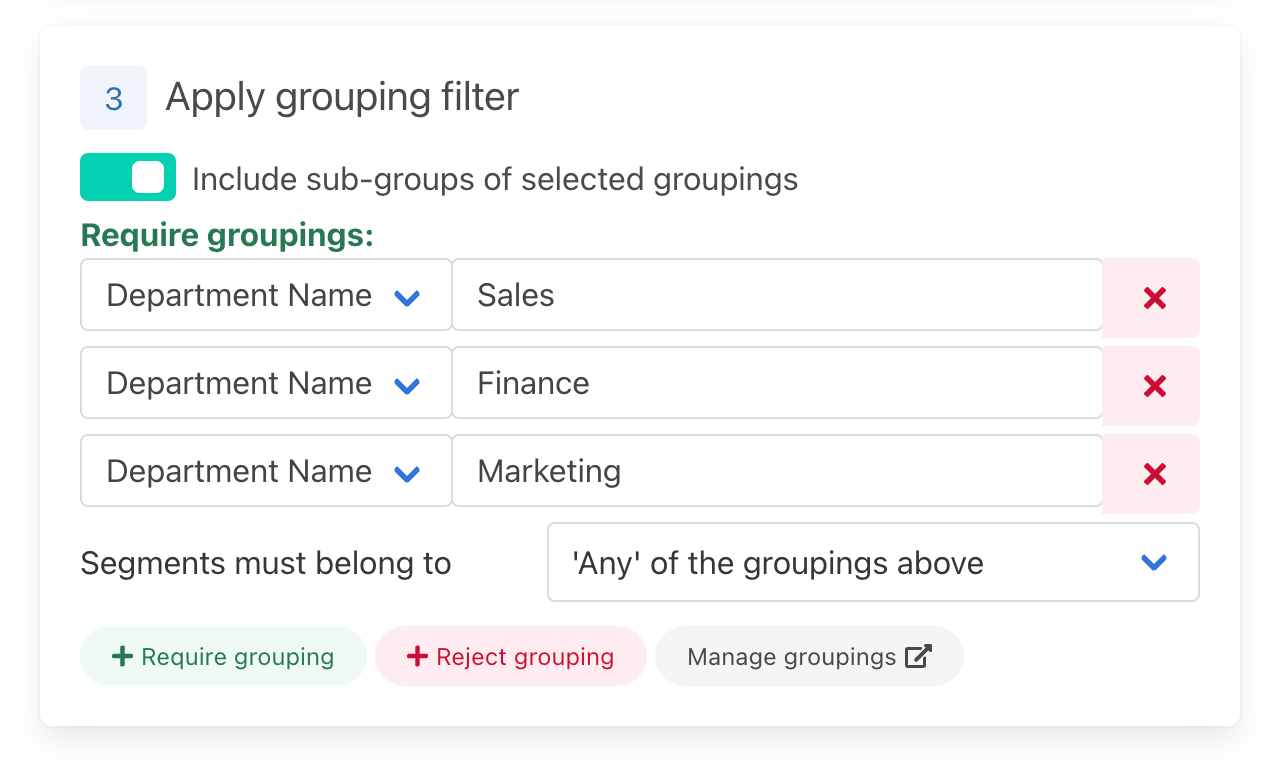
For example, for the grouping type “Department Name” if you only wanted the groupings sales, finance and marketing included in the export file you would add 3 “+ Require groupings” and specify those department names. You can specify that included segments must below to ‘any’ or ‘all’ of the selected groupings using the drop down menu.
If you do not want some groupings included in your report click on the red “+ Reject grouping” button and follow the same steps for the required grouping for the grouping you want to be rejected in the report.
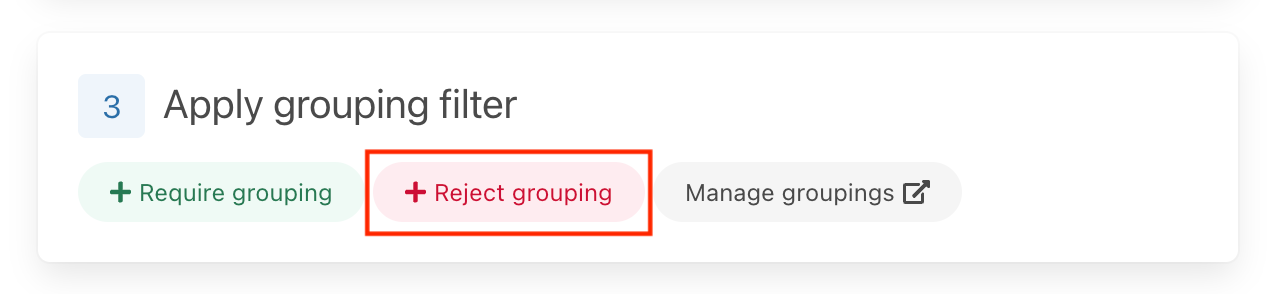
For example for the grouping type “booked country”, if you wanted to see all countries apart from the US you would add a “+ reject grouping” and input US for “booked country”.

If you have set a grouping hierarchy in your instance and want to see all sub-grouping in your report as well, toggle the “include sub-groups of selected groupings” slider.
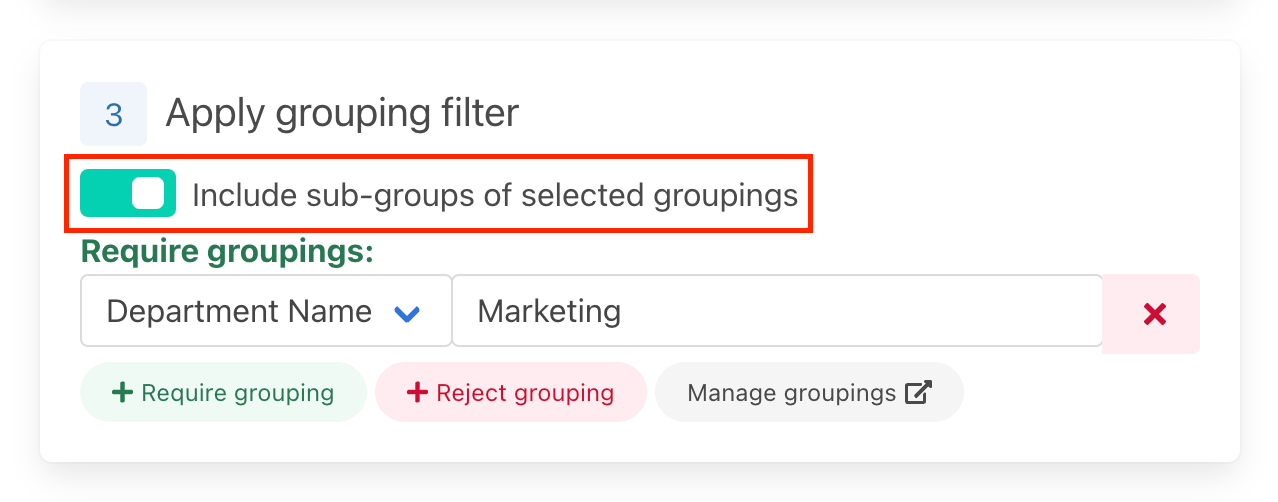
Clicking on “manage groupings” will take you to the grouping settings page for your instance in case you want to view the groupings included with your data.
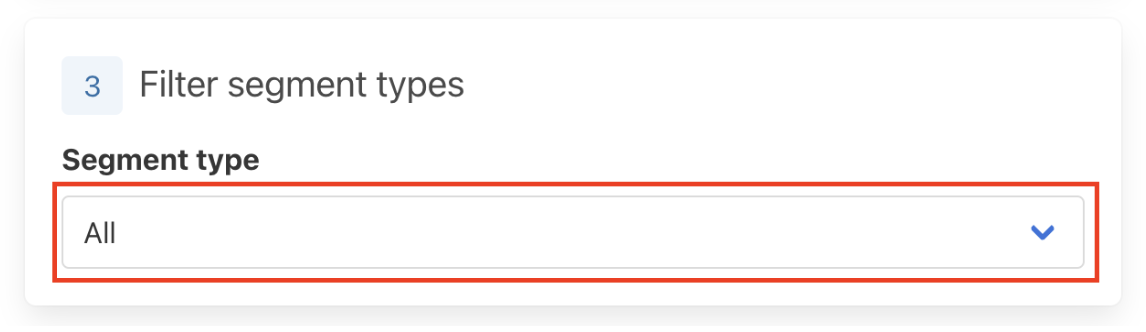
Next filter the segments you wish to include in your emission export by clicking on the “Segment type” drop down menu. You can choose to include the emissions from all segments or just export the emissions of an individual segment i.e., air.
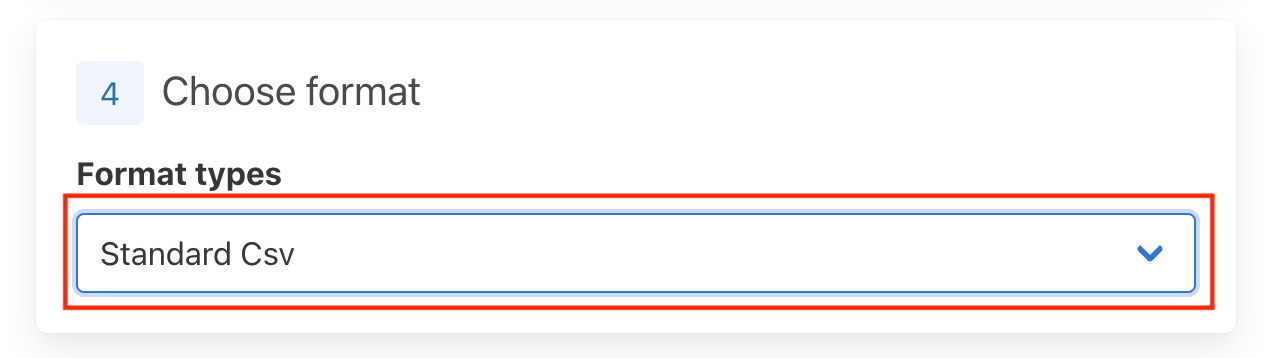
Then select the format of your exported data using the outlined dropdown box below. For most users the only option here will be “Standard CSV”
Finally, click the “Generate report” at the bottom left of the pop-up form to generate your emissions data.

2. Export your Emissions Data
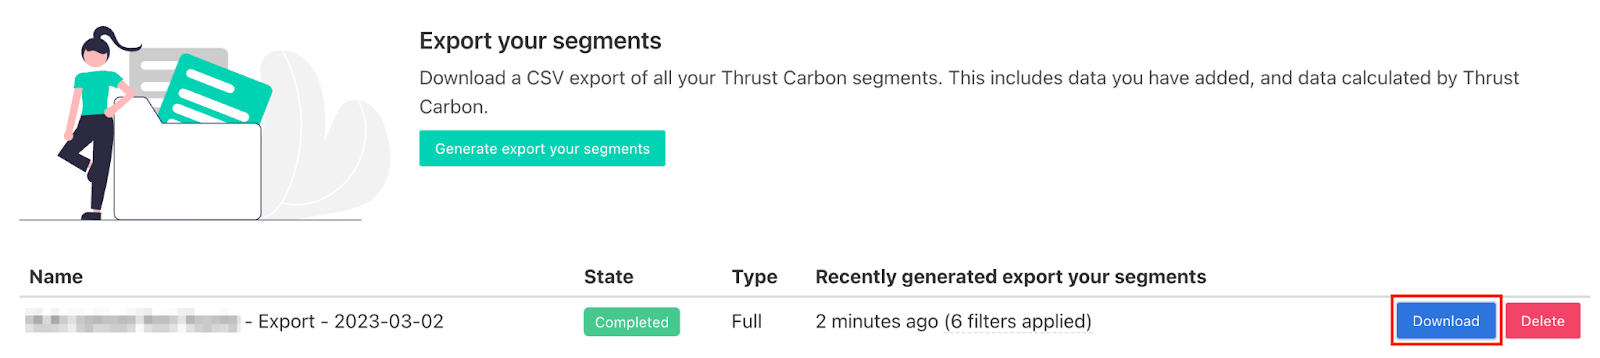
After generating your export emissions data a new row should appear with the status as pending. The name of your new file will be the “[name of the instance] - Export - [date of export]”. If you hover your mouse over the “filters applied” text you can see the filters you applied to this exported emissions dataset.
When the file is completed the status will change to completed and you can download the data using the download button shown below.
This will trigger the CSV file to download which you can open in your CSV reader software i.e., Excel.
Was this article helpful?
That’s Great!
Thank you for your feedback
Sorry! We couldn't be helpful
Thank you for your feedback
Feedback sent
We appreciate your effort and will try to fix the article