Overview
The Thrust Calculator allows white-label impact reports to be downloaded to explore your business’s carbon footprint from travel in detail. The calculator supports the creation of the following types of impact reports; overview, full, full without appendix, analysis and grouping. These can all be downloaded directly from the Calculator in pdf format and are emailed to the email associated with your Thrust Calculator account. You can also schedule an impact report to be sent to yourself and other key stakeholders on a regular basis.
1. Generate a Report
Access your instance that you would like to create a report for by clicking on the blue arrow on the right of the row or the instance name.

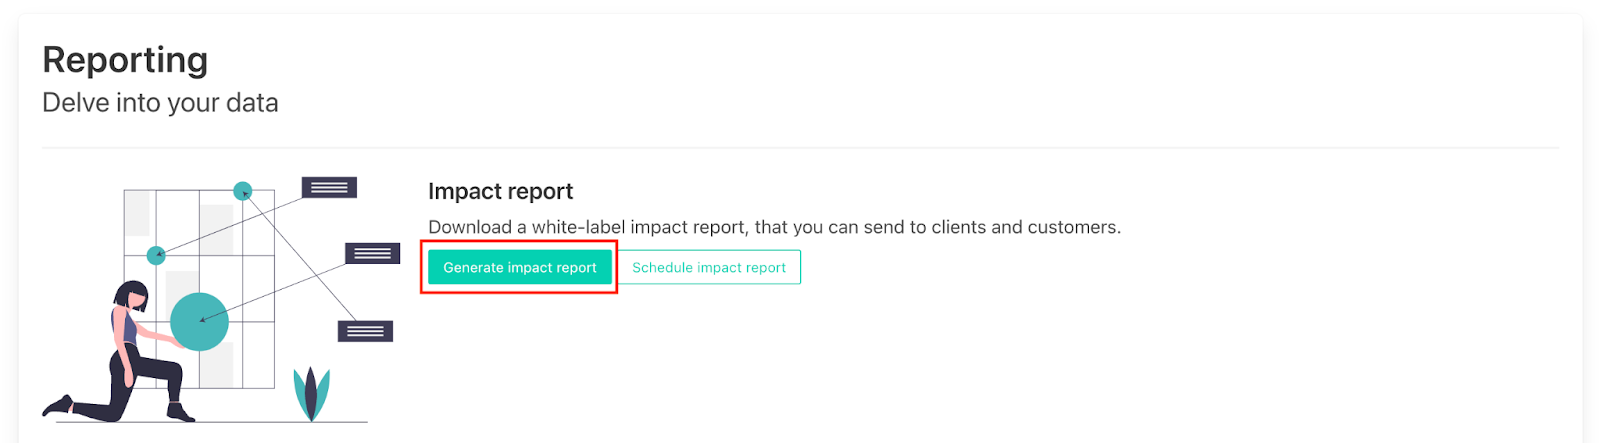
Once you are in the instance, to create a report click on the “reporting” header as shown below.

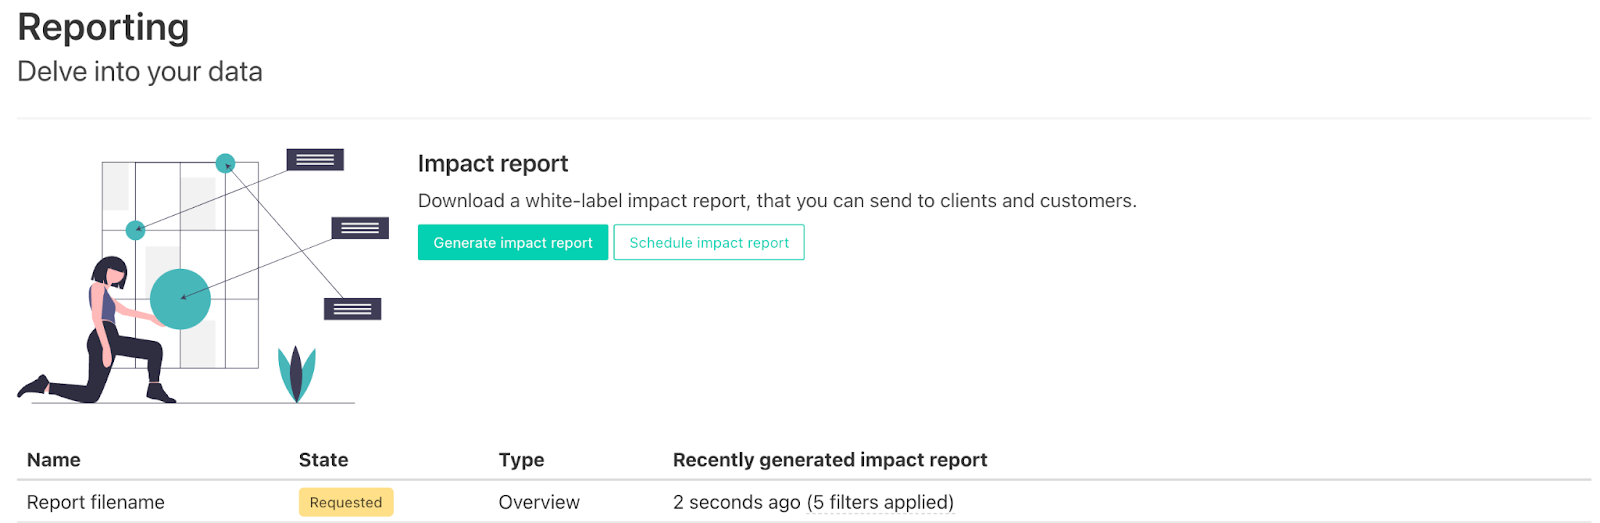
On the reporting page click the “Generate impact report” button and a pop up form will appear.
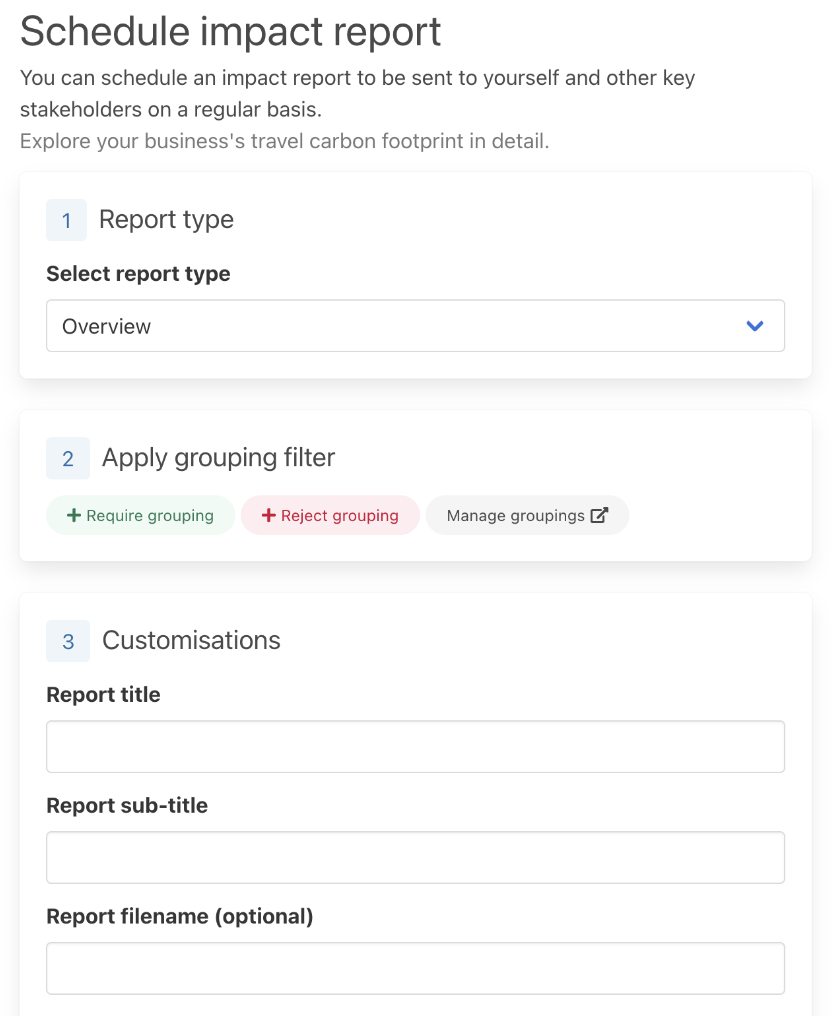
First, select the type of report you wish to generate by clicking on the “Select report type” drop down menu highlighted below. You can generate an overview, full, full without appendix, analysis and grouping report. Please see PDF content type explained user guide for more information on the different report types.

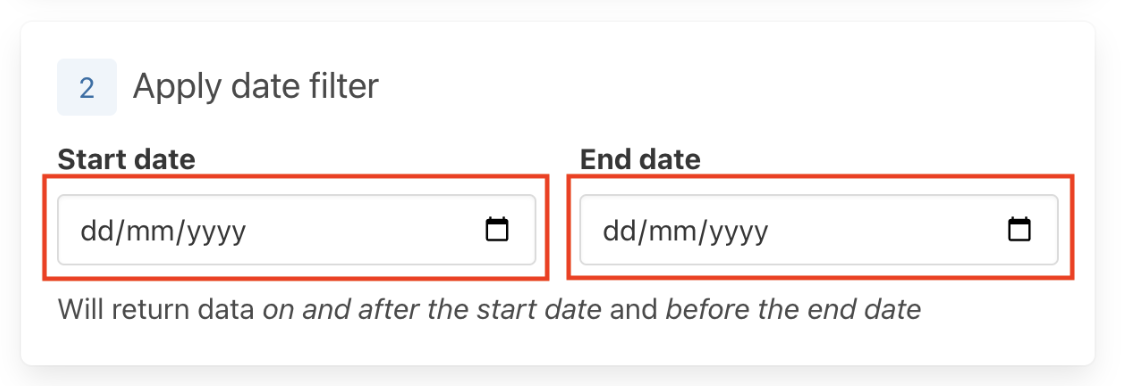
Next, add the start and end date for the period you would like to be included in the report by either typing in the boxes highlighted below or using the drop down list calendar.
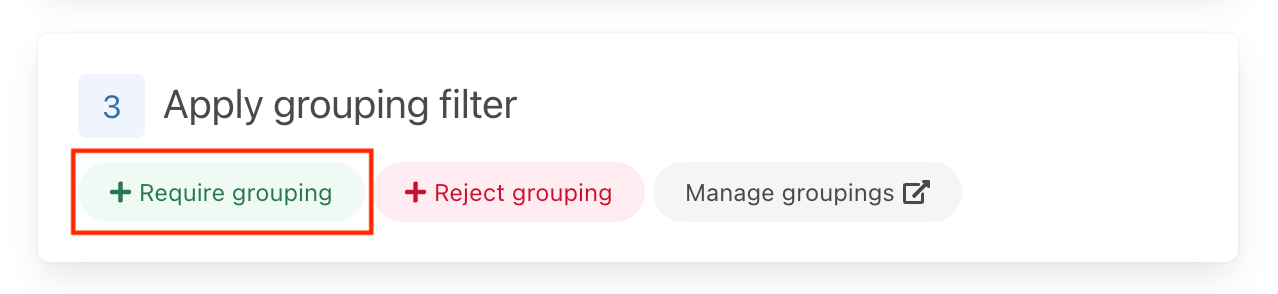
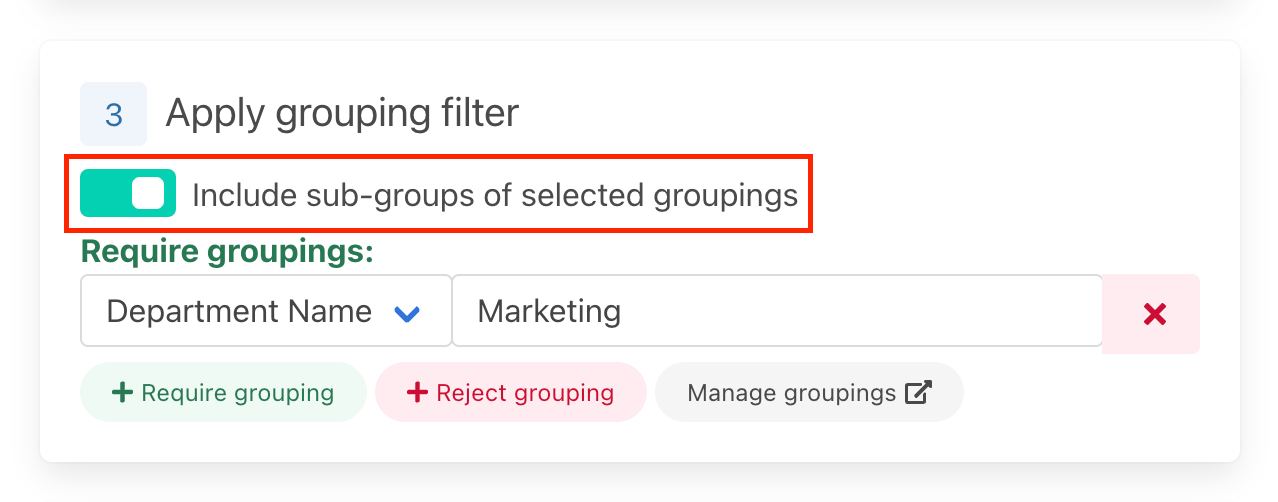
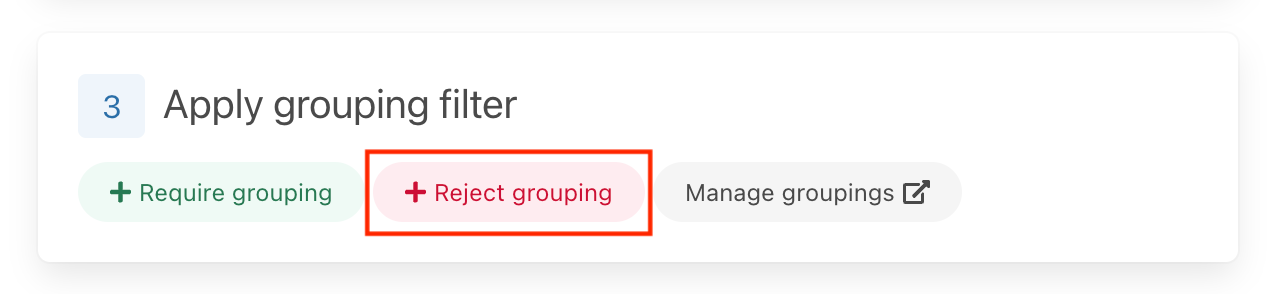
Thirdly, you can choose to filter the groupings that will be shown in your report. To add a grouping you want included in your report click on the green “+ Require grouping” button and select the grouping type from the drop down box on the left and use the search box for the name of the grouping you want to be included in the report.
For example for the grouping type “Department Name” if you only wanted the groupings sales, finance and marketing included in the impact report you would add 3 “+ require groupings” and specify those department names.
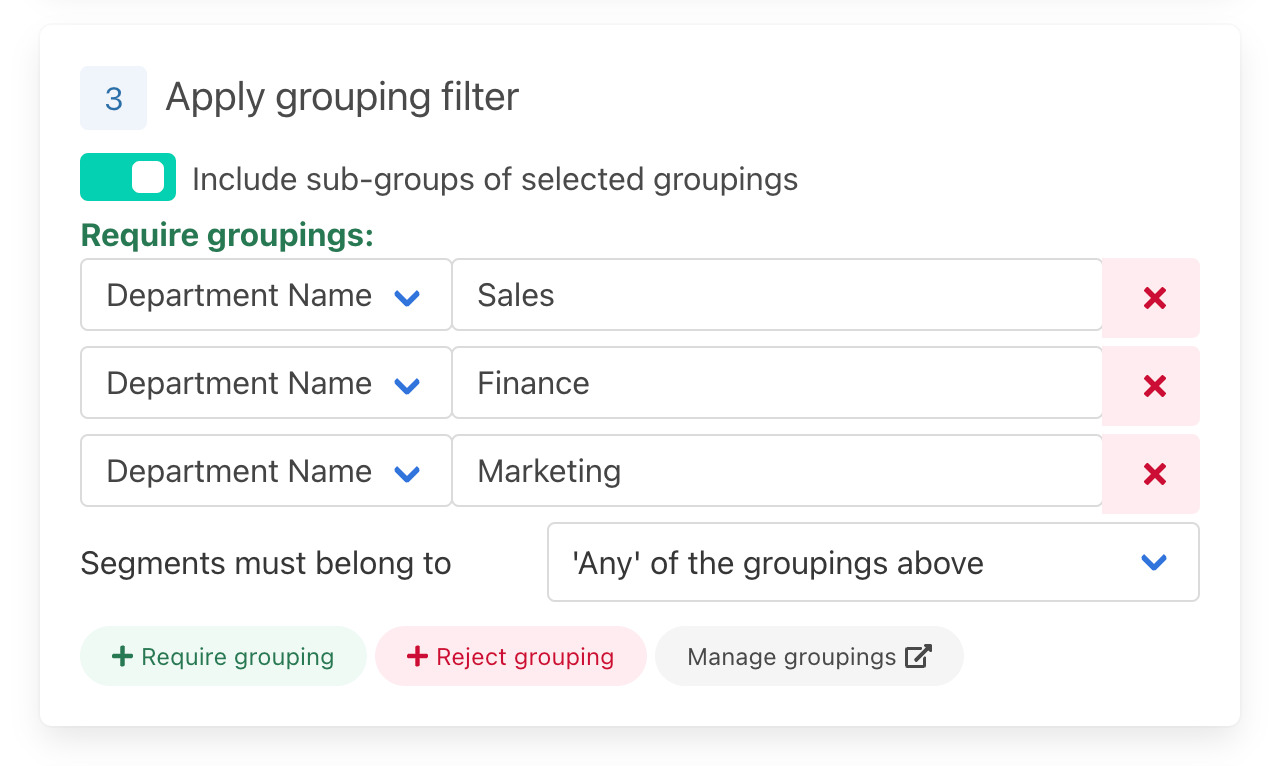
If you have set a grouping hierarchy in your instance and want to see all sub-grouping in your report as well, toggle the “include sub-groups of selected groupings” slider.
If you do not want some groupings included in your report click on the red “+ Reject grouping” button and follow the same steps for the required grouping for the grouping you want to be rejected in the report.
For example for the grouping type “booked country”, if you wanted to see all countries apart from the US you would add a “+ reject grouping” and input US for “booked country”.
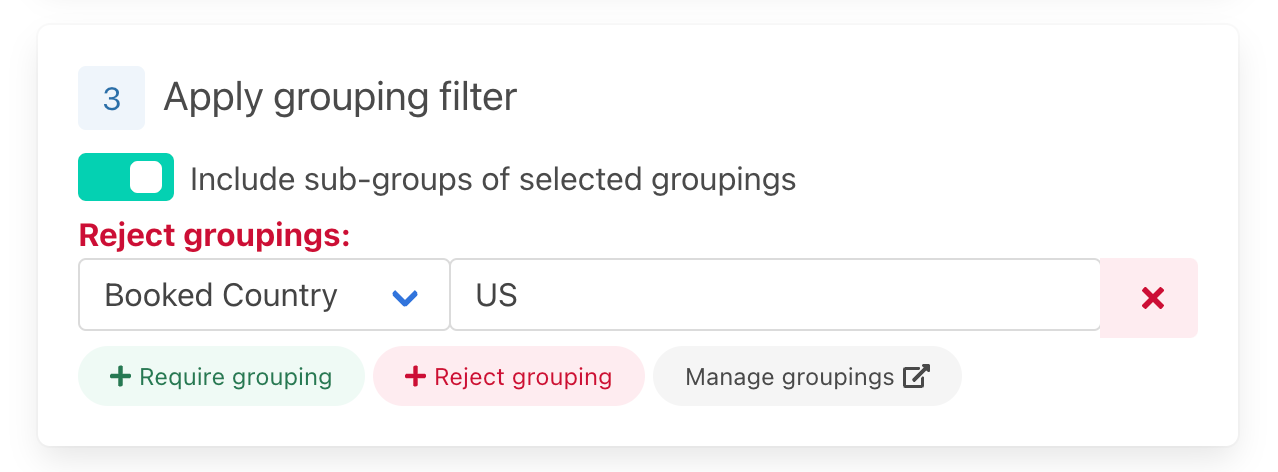
Clicking on “manage groupings’ will take you to the grouping settings page for your instance in case you want to view the groupings included with your data.
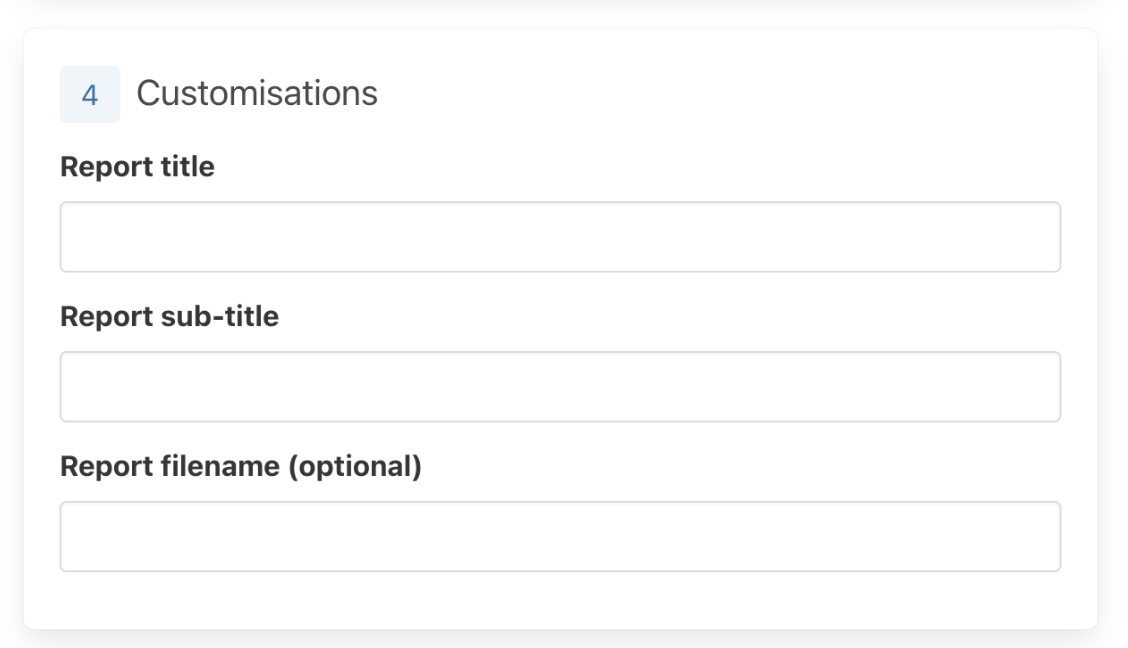
Next you can set a report title, report sub-title and a report file name. Please see an example of how the title and subtitle are formatted in the report below for reference. The report file name is what the downloadable file containing your report will be named.

When you have filled in all the above information click the green “generate report” button at the bottom of the pop-up form to generate your report.

2. Download your PDF Report
Once you have generated your report a requested report will appear under the reporting heading.
Once the report has completed being generated it’s status will change to completed and you can download a pdf copy of your report by clicking on the “download” button highlighted below. You can also delete your generated report by clicking the delete button.
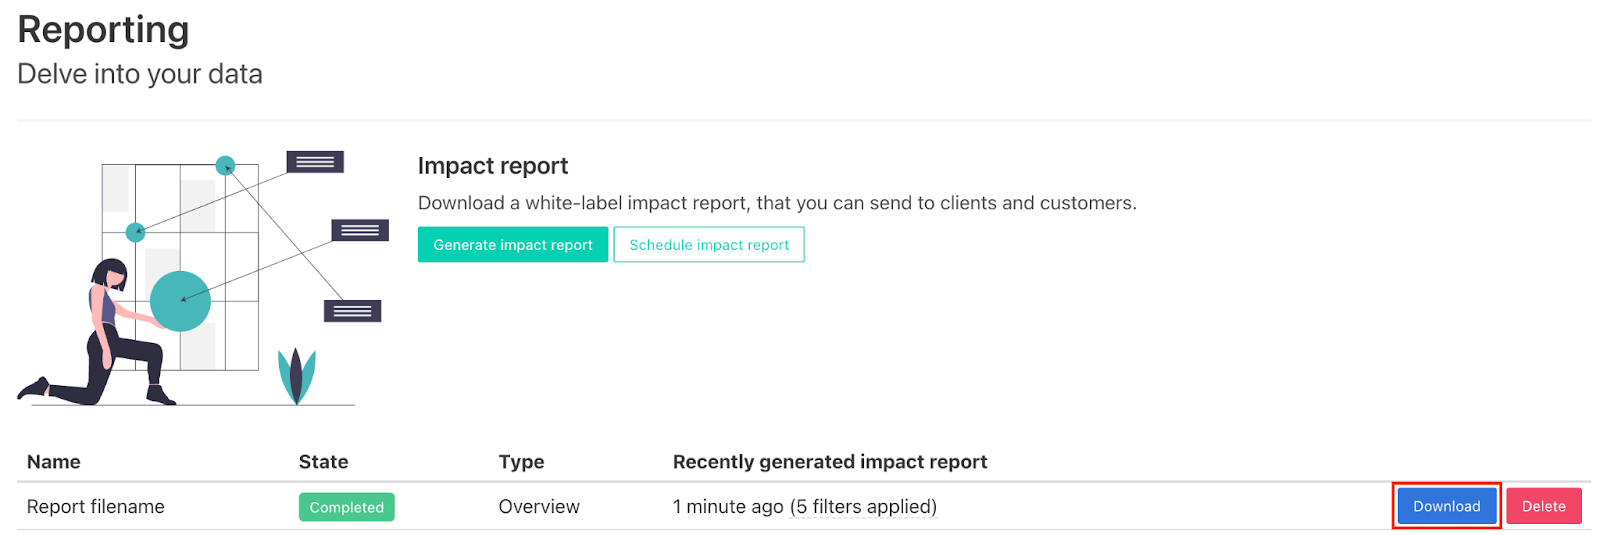
Your generated report will also be emailed to the email address associated with your Thrust Calculator account as a pdf attachment.
![]()
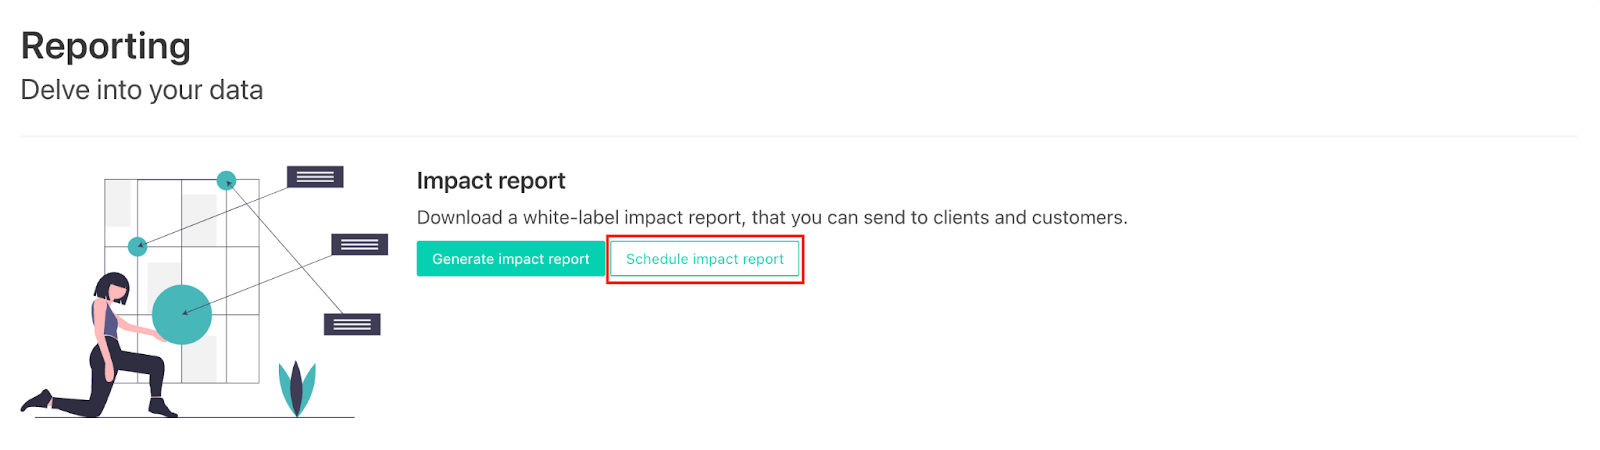
3. Schedule Impact Reports
The Thrust Calculator reporting section also has the option to schedule reports to be emailed to recipients at defined regular intervals.
To set this up first click on the “schedule impact report” button on the reporting page of your instance.
A pop-up form will appear. Fill out the desired report type, grouping filter, titles and filename following the instructions above.
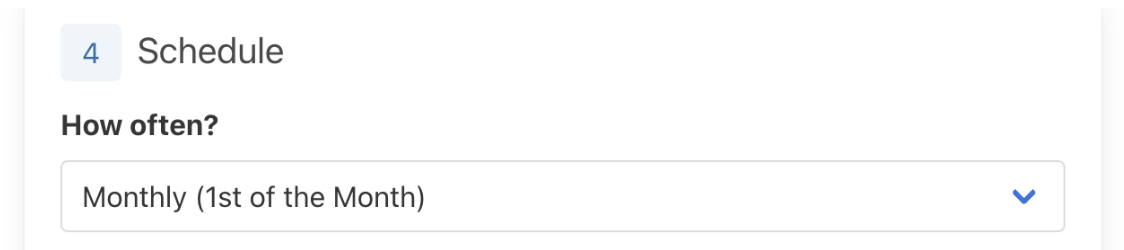
Schedule how often you would like the reports to be emailed to recipients. You can choose between monthly (sent the 1st of the month), quarterly (sent 1st of January, April, July and October) and yearly (sent on the 1st January).
Type the emails of the desired recipients of the schedule impact reports in the text box below “recipient’s email addresses”. To send multiple emails separate email addresses with commas as shown in the image below.

Once you have filled in these required details click the green “Schedule report” button at the bottom of the pop-up form.

Once you schedule your report you will see a new row added to your instances report page detailing the frequency, recipients and filter of your scheduled impact report. Hover over the “1 recipient” and “filters applied” text to see the emails it will be sent to and the filters you applied to the report. You can delete your schedule report by clicking the yellow “delete” button on the right.

Recipients will be notified that they will receive reports from Thrust Carbon and given your name and email to contact if they have any questions about the report.
Was this article helpful?
That’s Great!
Thank you for your feedback
Sorry! We couldn't be helpful
Thank you for your feedback
Feedback sent
We appreciate your effort and will try to fix the article