Overview
The Thrust Calculator allows you to white label your Impact Reports. This allows you to apply your company's logo and branding colours to your Carbon Emission reports.
1. Navigate to the Settings
To change the branding and colouring of your reports you need to navigate to the settings, do this by clicking on the “settings” button as shown below.

Once in the setting page scroll down to the “Report White Labelling” section, as shown below.

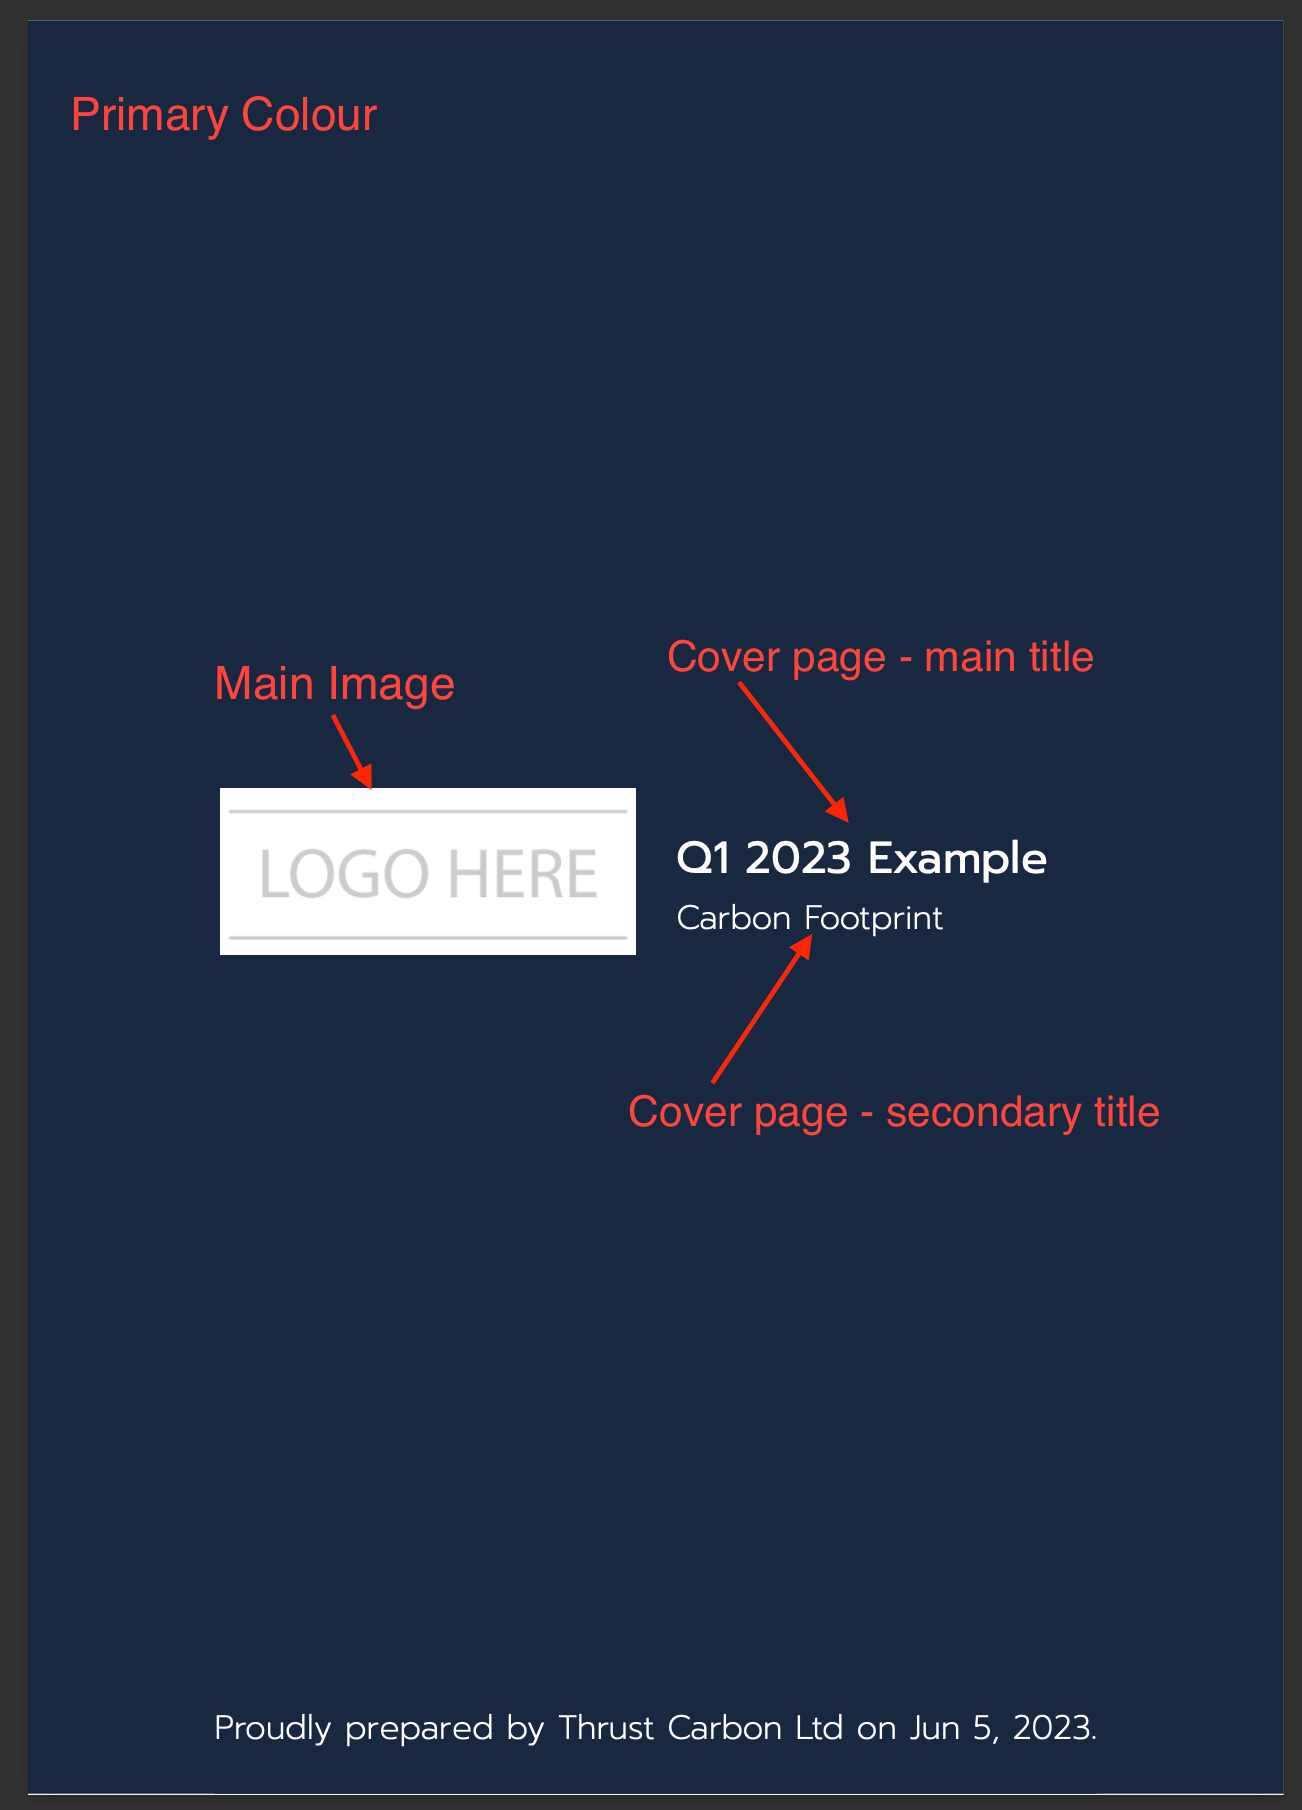
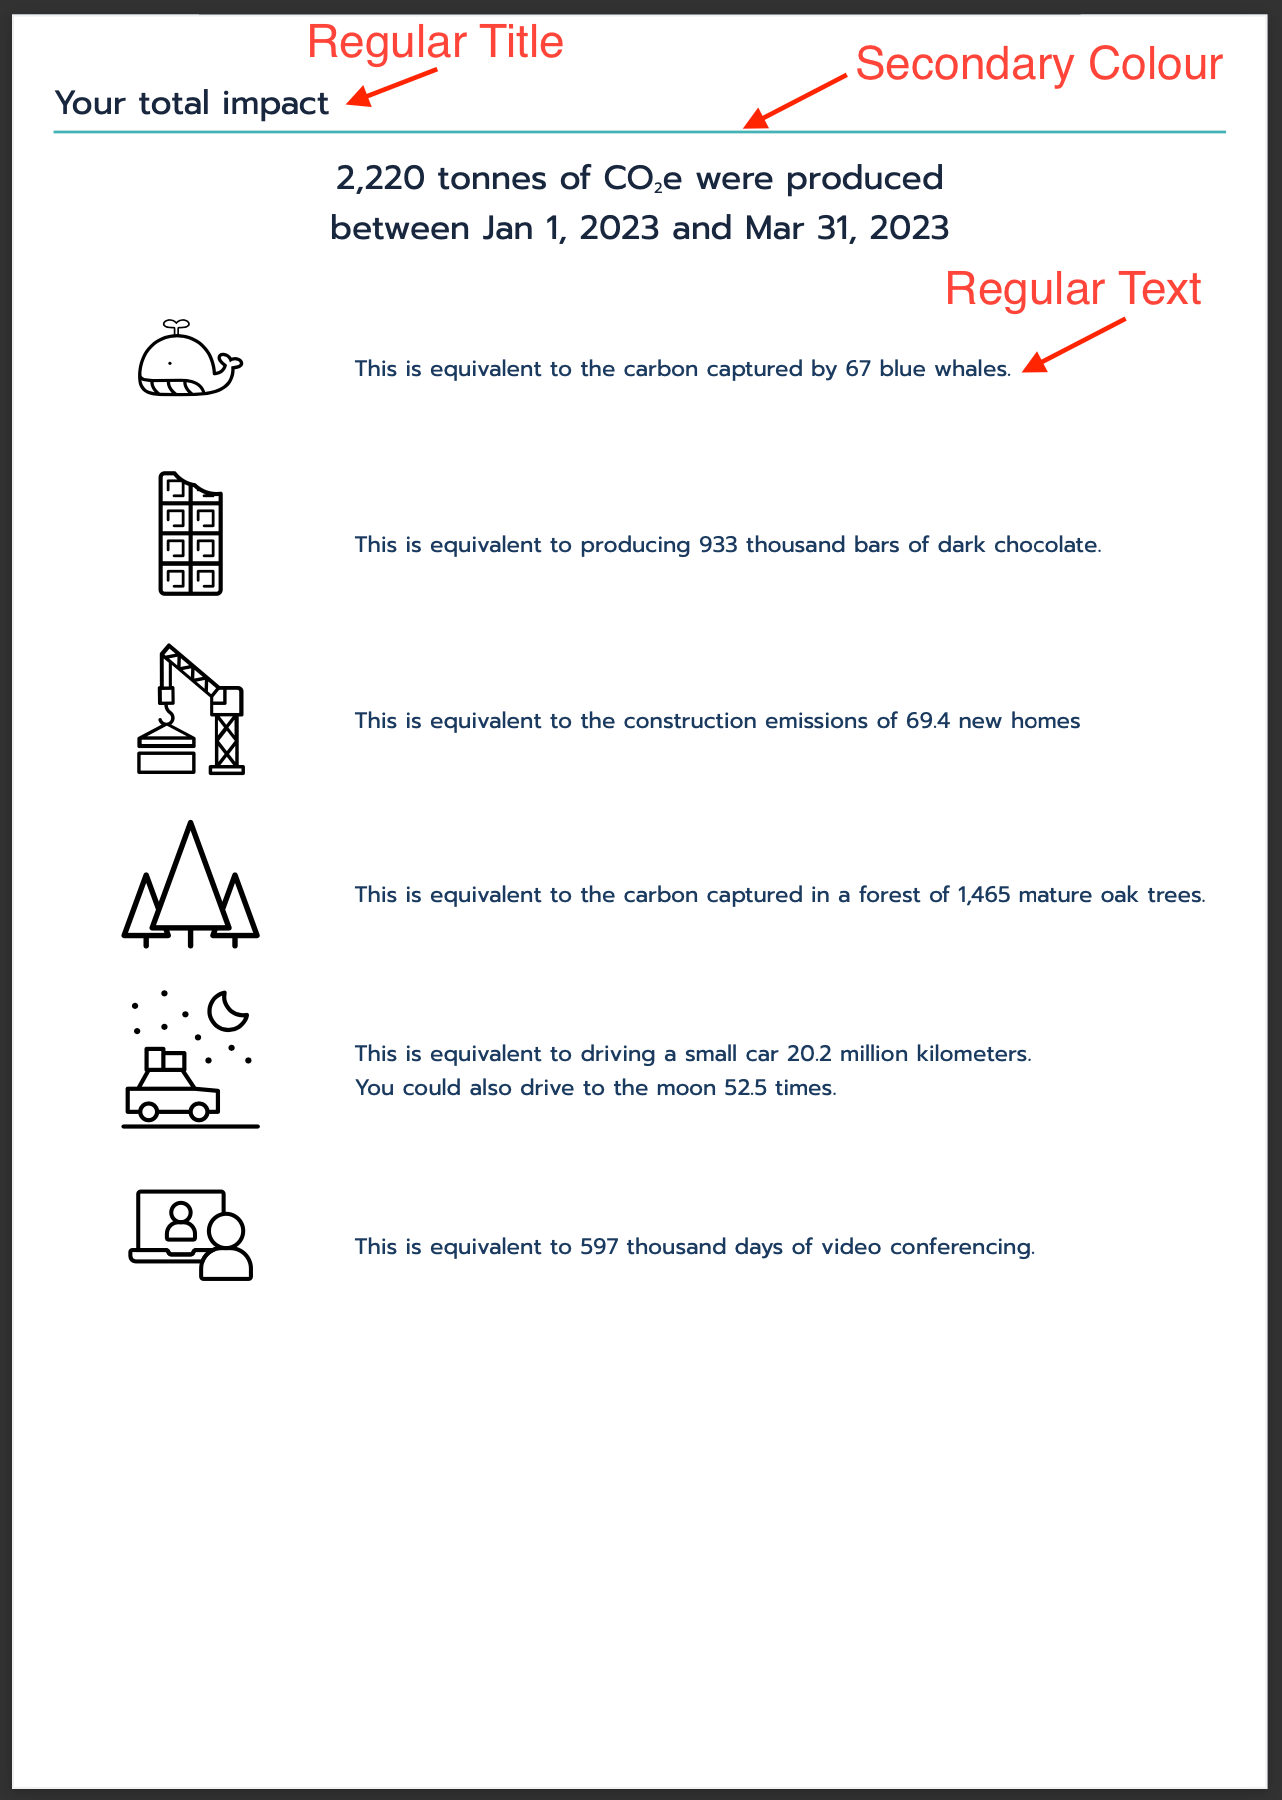
2. Explaining the white label options
The following example pages of the Impact Reports are annotated to show what the white label inputs in the settings refer to in the report.
Terminology:
Notice that at the bottom of the Report White Labelling section there is the option to change some of the terminology that will be present in the report. While in some organisations the word "segments" will be understood by report readers, in others you might change this to "individual emissions" to make the term accessible. Similarly, the word "target" might not match your company culture - in such cases, you might wish to use the term "limit" or "ceiling".

3. Making changes to the report white labelling
Once you are happy with the changes that you have made scroll down to the “save” button and click on this as shown below.

Note that any changes you make to the report white labelling will only be applied to new reports you generate from the Reporting tab. Previously generated reports in the Reporting tab will not have these new changes applied to them.
Was this article helpful?
That’s Great!
Thank you for your feedback
Sorry! We couldn't be helpful
Thank you for your feedback
Feedback sent
We appreciate your effort and will try to fix the article