Overview
The Thrust Calculator enables full spreadsheets to be “bulk uploaded” to the system. The calculator then calculates the emissions of the activities present within the spreadsheet (travel or meetings). On completion of uploading the spreadsheet(s) it is possible for the user to generate a customised report with a breakdown and overview of all the emissions calculated through the bulk upload. This document describes the process of bulk uploading spreadsheets to the Thrust Calculator.
1. Cleaning the Spreadsheet
See User Guide: Spreadsheet Preparation for Bulk Uploads.
2. Uploading the CSV file
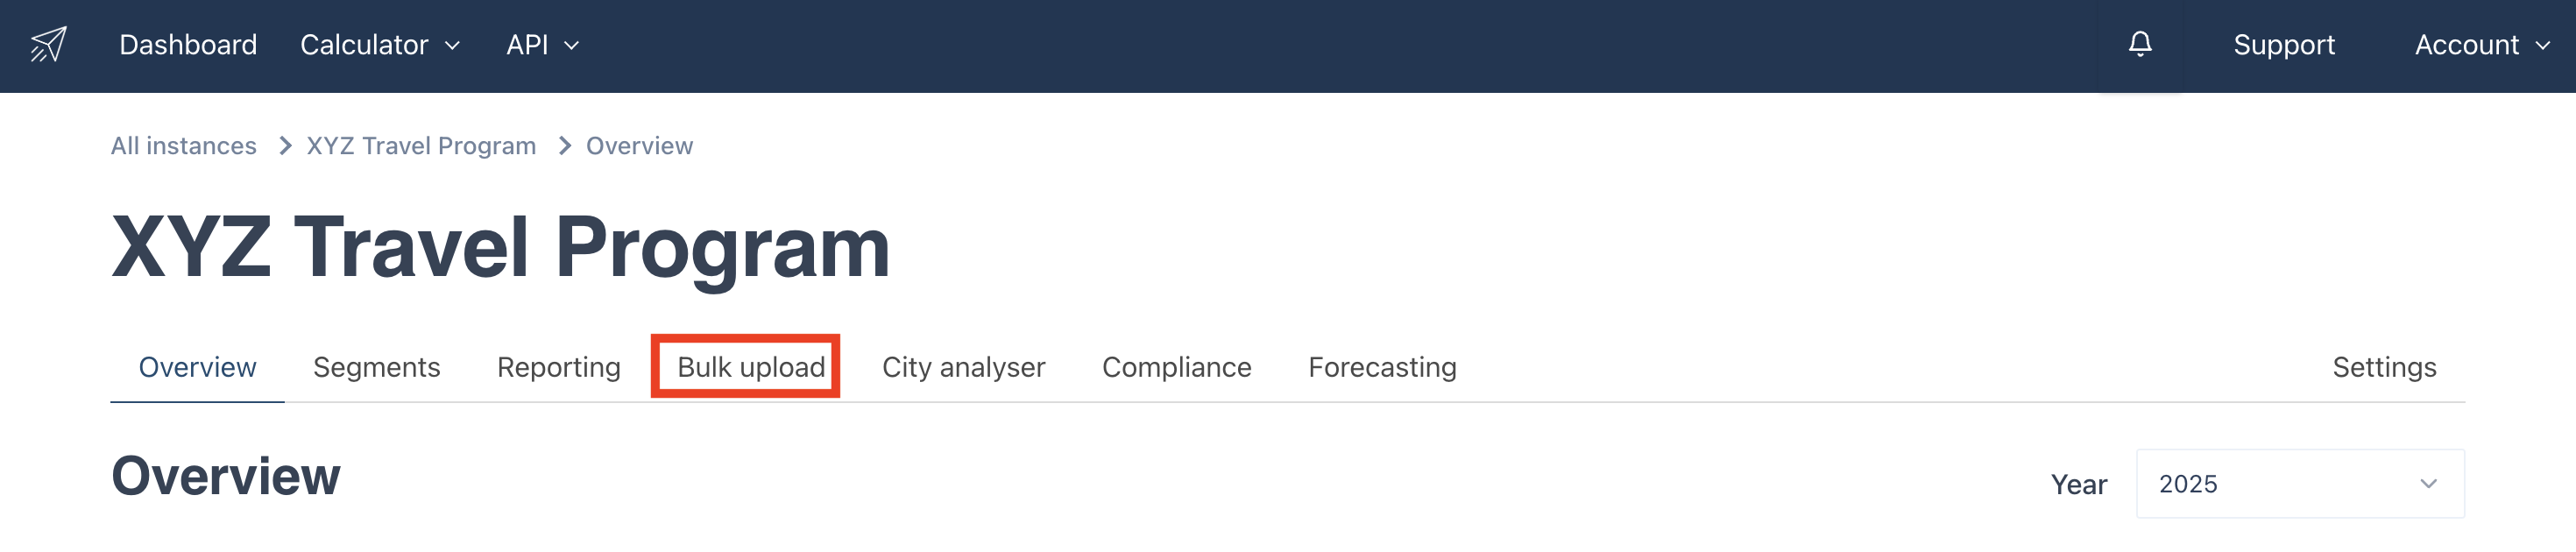
Once you have cleaned and saved your spreadsheet as a CSV you are ready to upload the file to the Thrust Calculator. To perform a bulk upload first make sure you are within the correct instance. When you are in the instance you want to upload the file to click on the “Bulk Upload” tab to get to the page shown below.
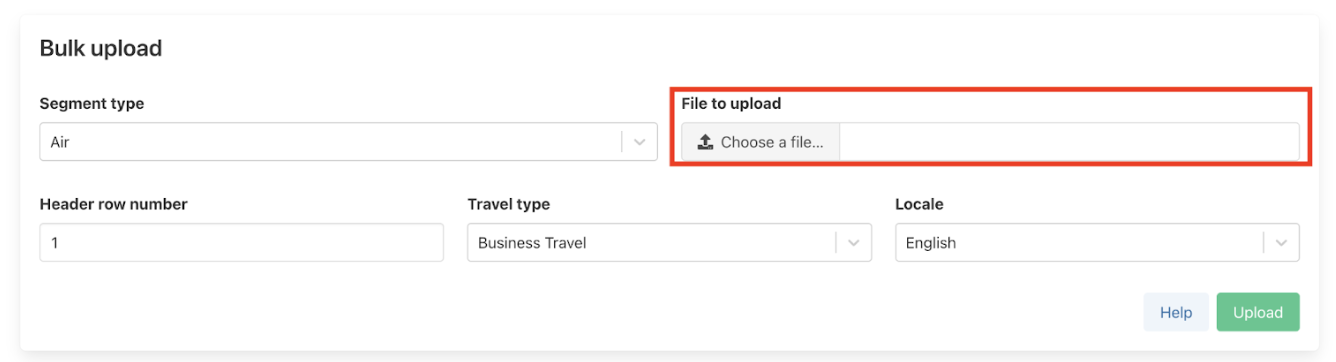
The first step is to load in your CSV file to the Thrust Calculator. Click on the “Choose a file” button as shown below and select which file you would like to upload.
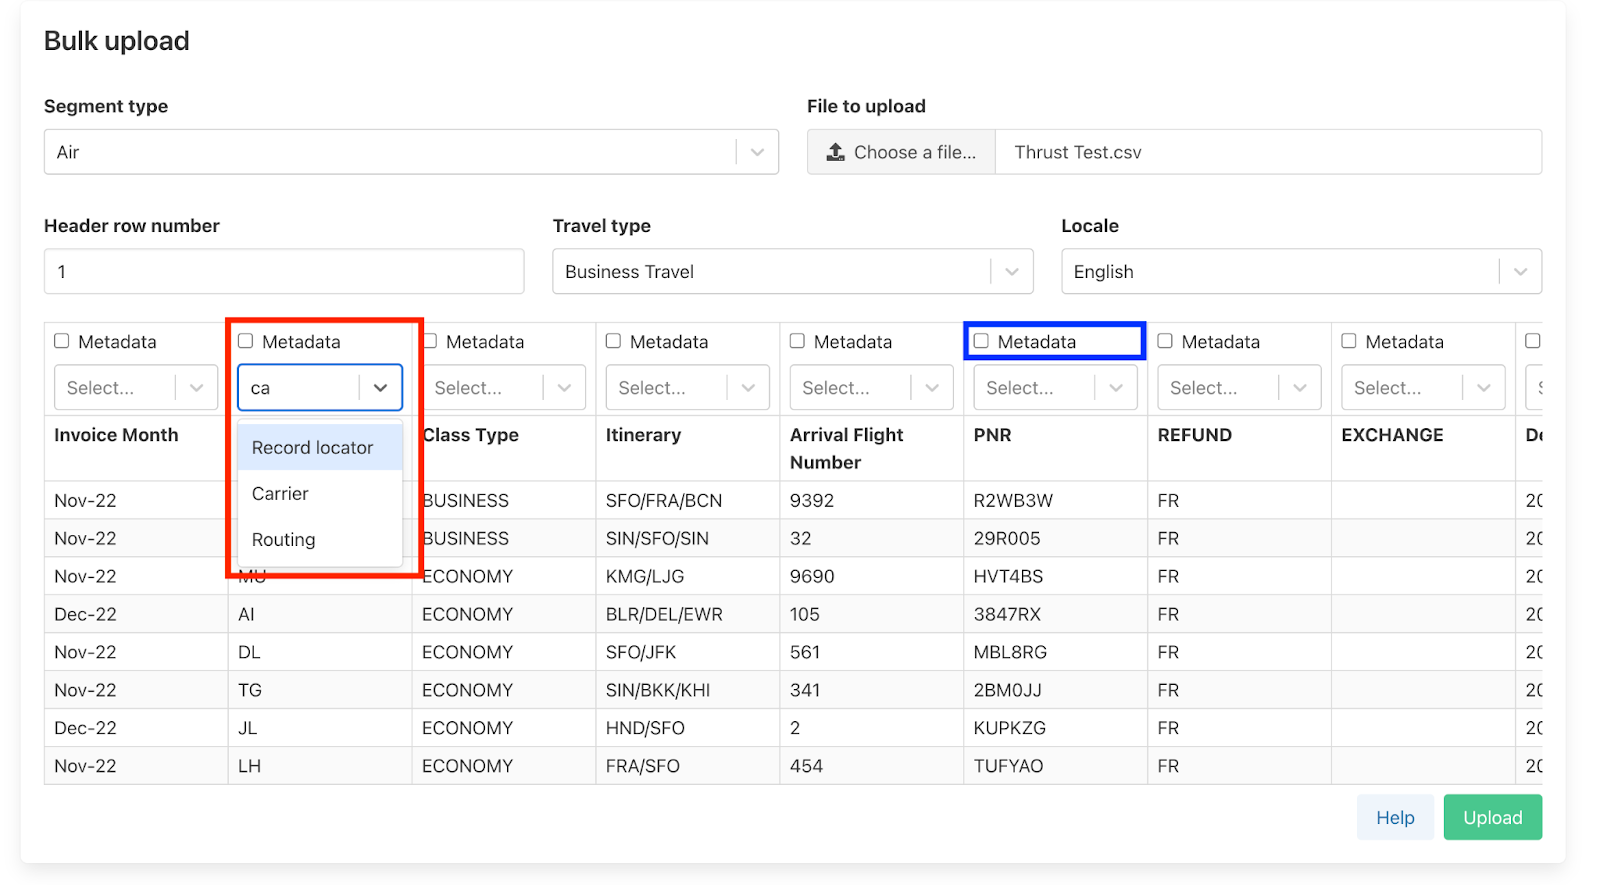
Once the file has been loaded a preview of the first 9 rows of the spreadsheet will be displayed as shown below. The “Header Row Number” input (red box below) states the row number which includes the column header title. Most spreadsheets will include the column header in row 1, however if this is not the case for your spreadsheet type in the row number of where the column headers are.
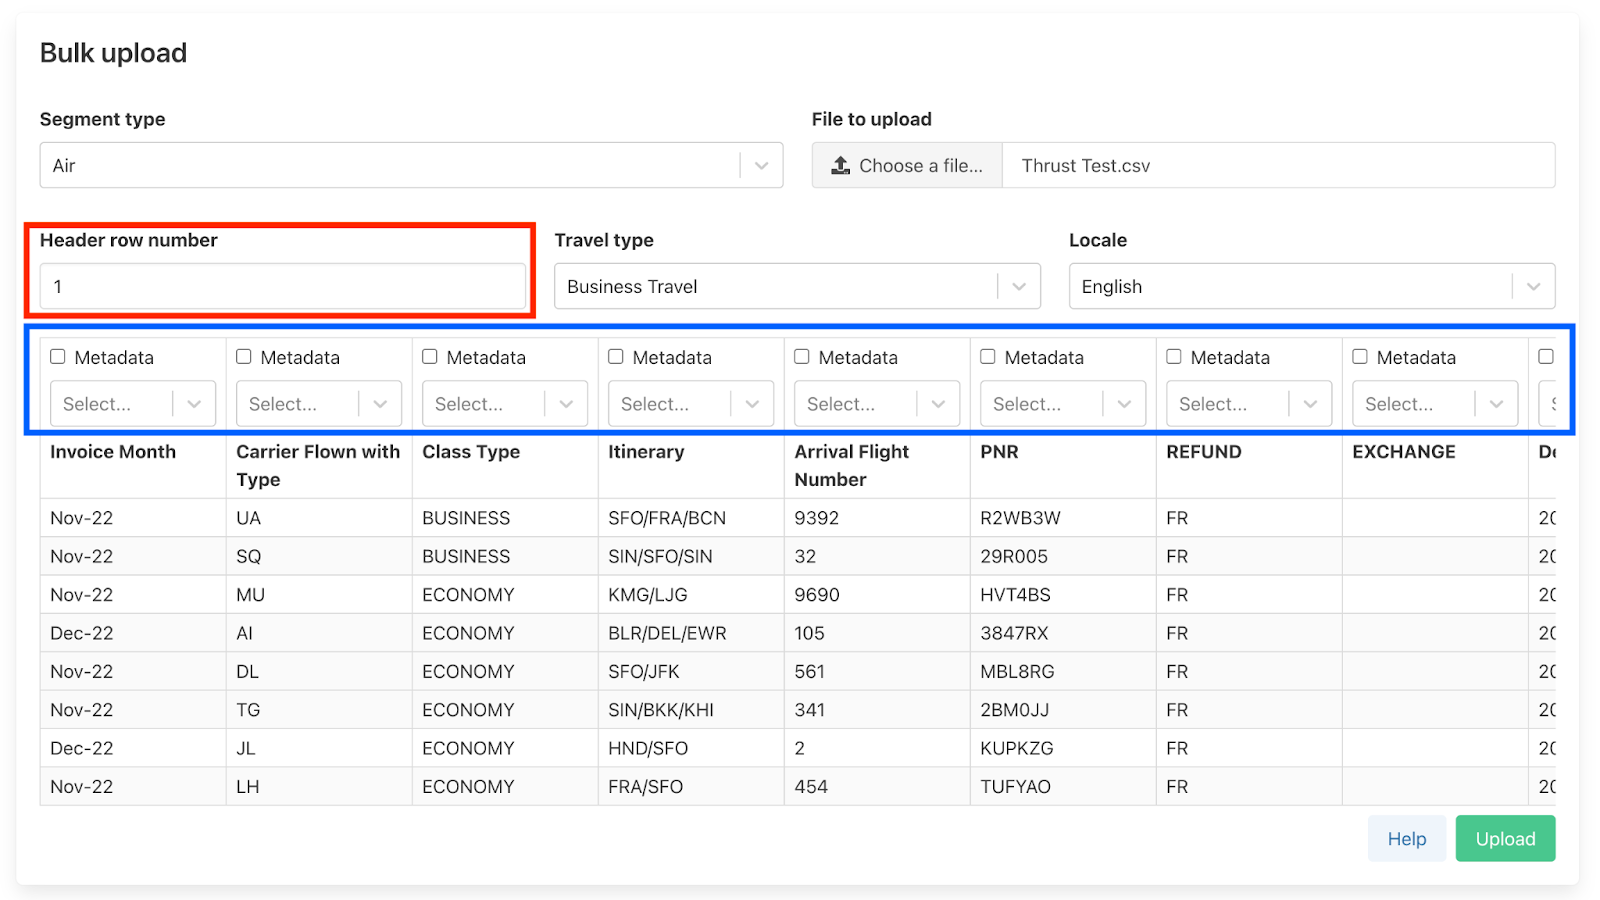
The calculator will attempt to “fuzzy” match the headings (blue box above), however as the user you will need to double check this matching is correct in addition to filling in some of the headers that the Thrust Calculator has not been able to match. For ease and to save you scrolling through the full list of header titles you can type in the header in the “Select” box too.
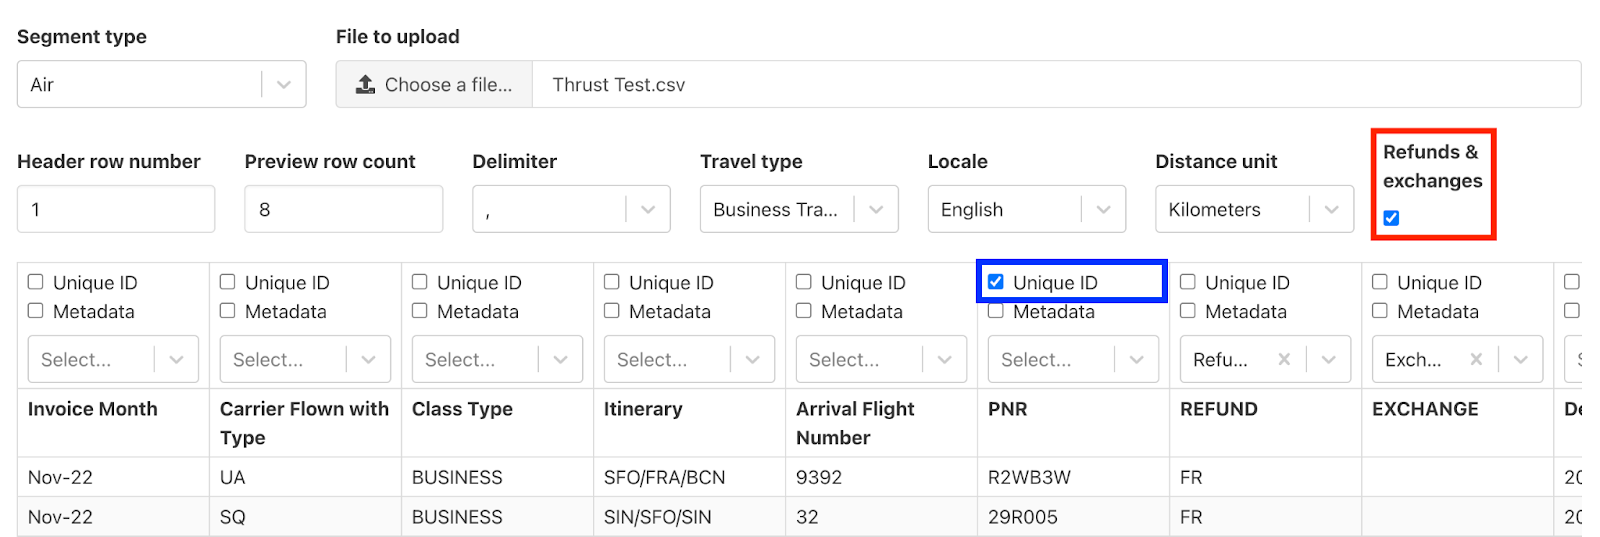
If your spreadsheet includes refunds and exchanges be sure to tick the “Refunds and Exchanges” box as shown below highlighted in red. You will need to specify which columns contain the refunds and exchanges. Tick the “unique ID” box for all columns that are to be used in matching up exchanges and refunds with original bookings. For more information on how to choose a unique ID please see the appendix.
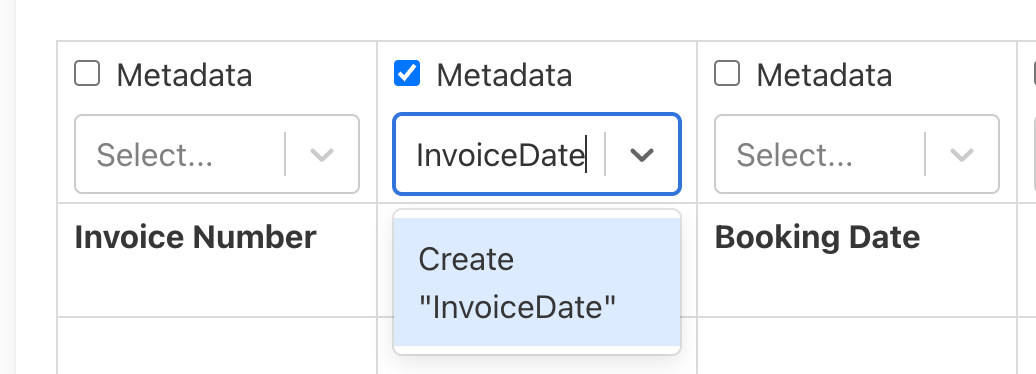
For any of the columns of data that you want to be classified as Metadata you will need to tick the metadata check box (see below). The first time you click on a metadata check box you will need to type in the metadata key in the input box below the metadata checkbox. An example of a metadata key would be InvoiceNumber. On adding this metadata key, you will not need to re-type this in for future bulk uploads, instead once you click on metadata the drop down menu will show your previously entered metadata keys.
Please see the Appendix for an explanation of “Metadata” in this context.
Once you have ticked which columns you want to be included as metadata you will also need to define the metadata key, do this by typing the key into the “select box” and make sure that it has been selected, as shown below. Note that you must use the same metadata key for every upload within one instance e.g. invoiceNumber or invoiceDate (not a range of similar names ‘invoice date”, “InvoiceDate”, “Invoicedate”).
When you have finished including all the column headers and metadata labels your file is ready to be processed by the Calculator. Click on the “Upload button” at the bottom right of the page. You will be navigated to another page which will show you the progress of the upload.

3. Viewing the Uploaded Segments
Your upload has now been uploaded to the Thrust Calculator. We recommend doing a check on your upload which includes checking the number of rows, refunds and exchanges in the spreadsheet and cross-referencing this against the results the Thrust Calculator has produced.
As you can see below there are 6 columns headings that give you information about the bulk upload.
Type. This states which segment type the file was uploaded as.
Successful. This shows the total number of segments that were able to be uploaded to the Calculator. Note that it does not represent the number of segments that are contributing towards your emissions - some of these successful segments may be deleted if your upload includes refunds and exchanges and a segment is flagged as an original booking with the unique identifier.
Unsuccessful. This states the number of segments that were unable to be uploaded to the Thrust Calculator. See below for more details on errors.
Cancelled. This references the number of refunded segments (rows) within the spreadsheet you uploaded.
Exchanged. This states the number of exchanged segments (rows) within the spreadsheet you uploaded.
Ignored. This values represents the number of segments that have not been uploaded as the Calculator has identified these segments as original bookings that correspond with exchanged or refunded segments within your spreadsheet.
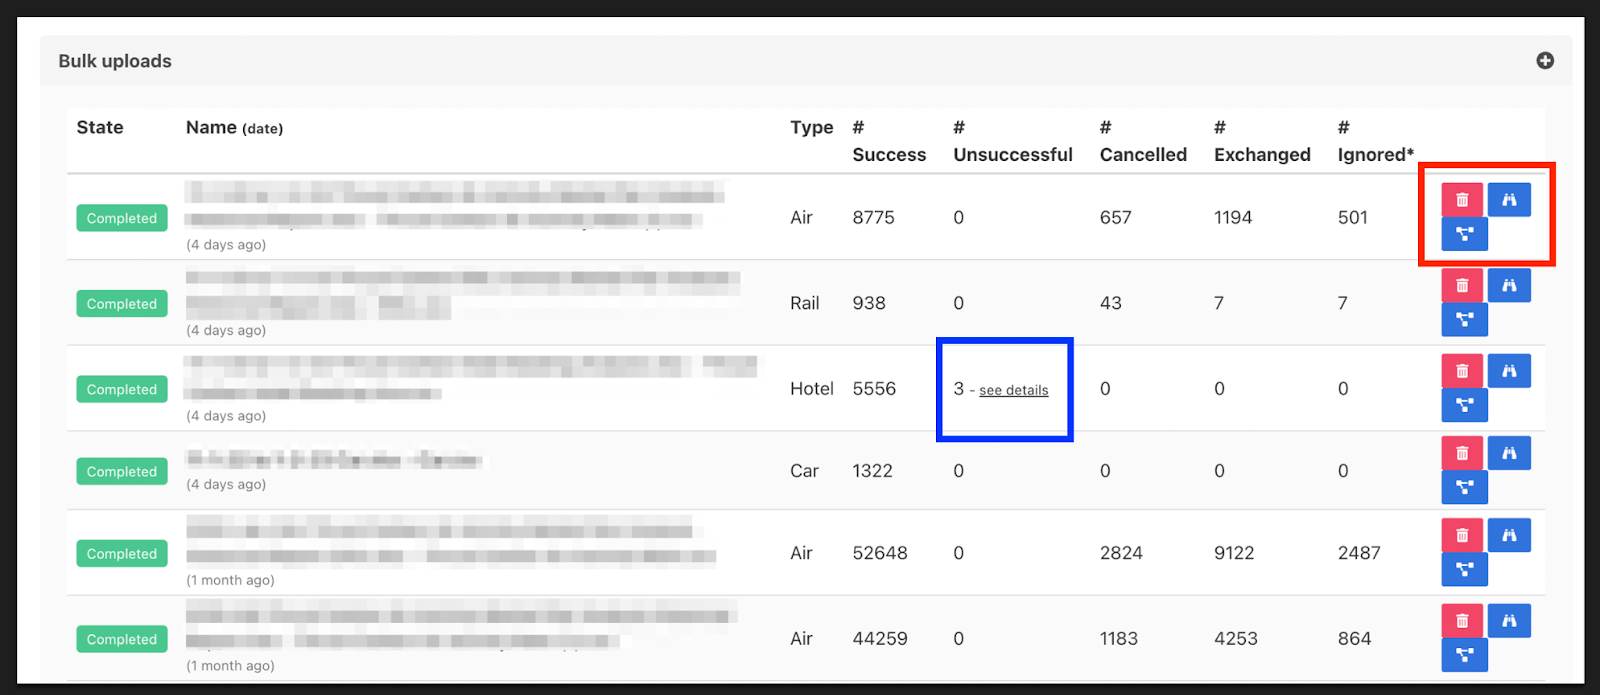
If any errors have occurred with your upload, click on the “see details” button to better understand what has caused the error. An example error message is shown below.
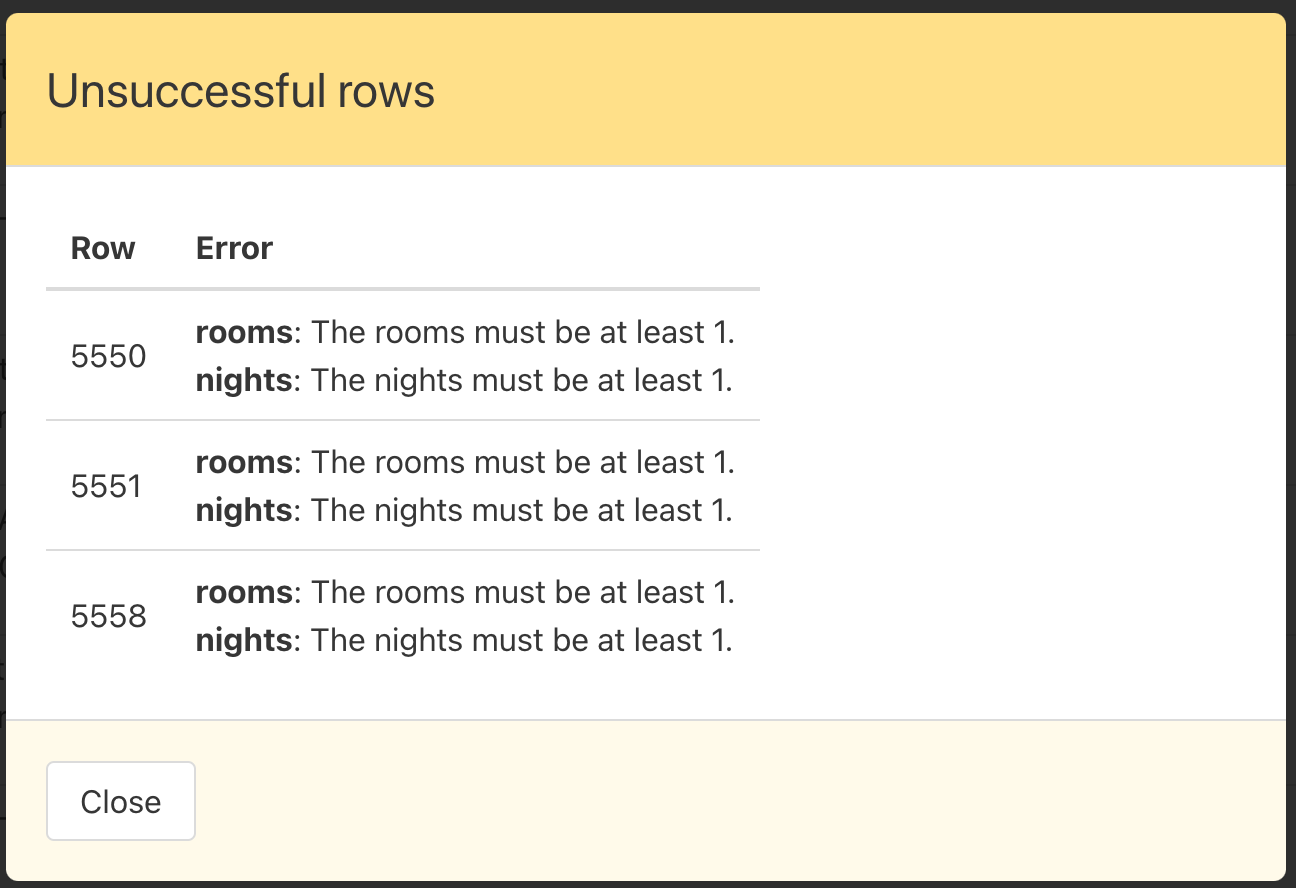
Depending on the number of errors or cause for the error you may want to amend these issues within the spreadsheet and re-upload the file. Before re-uploading the corrected CSV file, make sure you have deleted the original upload to the Calculator, this can be done by clicking on the “Delete Upload & Segments” button.
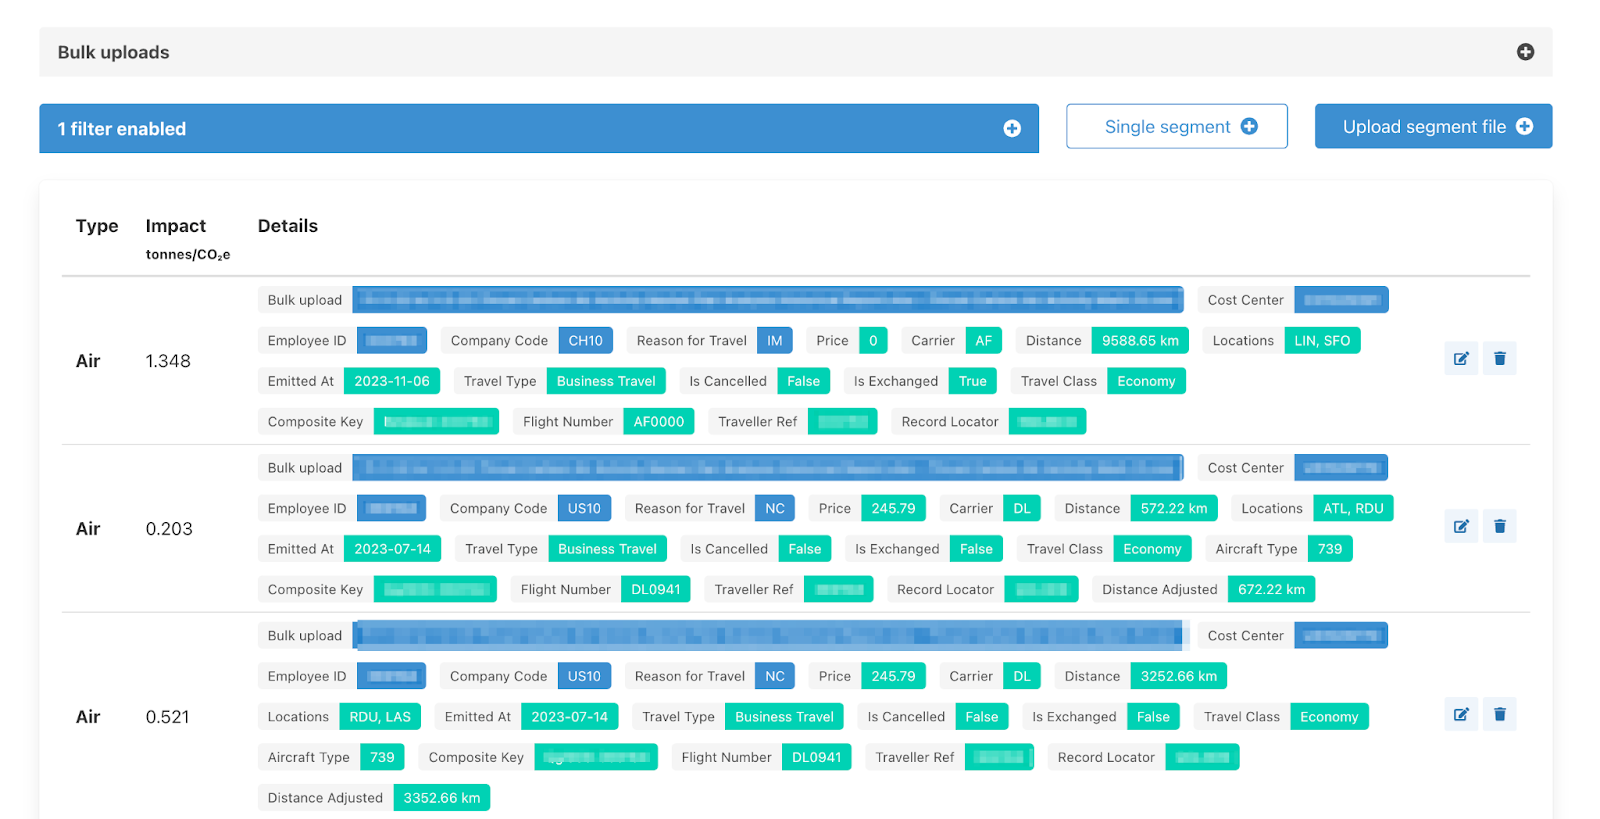
To see the individual segments within this bulk upload click on the “View Segments in Upload” button which will show you the individual emissions for each row of data uploaded in addition to all the tagged information for each segment (see below).
4. Appendix: “Choosing a Unique ID”
The Thrust Calculator uses the Unique Segment Identifier to "match" rows which are tagged as refunds or exchanges with the original booking row. Such that both the refunded row and the associated original booking row are removed from the calculation. If a unique segment is not included in the upload it is possible that these original bookings that are in fact cancelled will still result in a carbon emission.
How to identify a unique segment?
The unique segment can contain multiple columns from the spreadsheet. However it is often possible to use one column as the unique segment, such as “ticket number”. Common examples of using multiple columns to achieve a unique segment are:
PNR + Ticket number
PNR + employee ID
Ticket number + mileage (absolute value)
Note) Try not to make your unique identifier too unique. Things often change between records (e.g. names become initials, etc).
It is recommended to do a spot check of the refunded rows and the chosen “unique segment” identifier within your spreadsheet to ensure that it genuinely matches an original segment with its alterations.
5. Appendix: “Metadata” explained
At a high level, it’s “data about data”. When you send an email for example, “metadata” might include the Sender and Receiver, but would not include the email content.
Storing metadata fields can be helpful to make data from the Thrust Carbon intelligence platform interoperable with data from other sources, for example your TMC’s post-trip reporting system..
Examples
In our use case, “metadata” means additional information about a particular segment which has no impact on how the calculation is applied. A “hotel” segment would be associated with segment metadata a Hotel Reservation ID; a flight might have a Ticket Number; both might be associated with the same Invoice ID.
By contrast, the “class” field in an Air segment is not metadata, because it informs the way that we calculate the emissions of the segment.
Why this is different from “Groupings”
Groupings are different because, though like metadata they don’t impact the calculation, they are there to “group” disparate segments in a way that makes the data analytically useful. They are closely analogous to “custom fields” that TMC and booking tool reporting systems provide.
Metadata isn’t there to group large numbers of segments together; it’s there to identify specific segments or very small sets of them.
Was this article helpful?
That’s Great!
Thank you for your feedback
Sorry! We couldn't be helpful
Thank you for your feedback
Feedback sent
We appreciate your effort and will try to fix the article